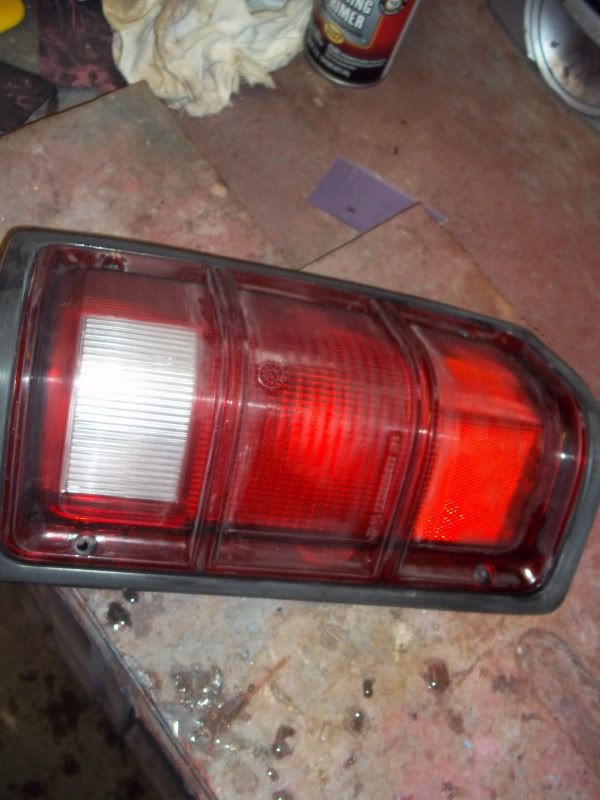
had to replace my taillights.. so i took a little extra time to paint and tint then proper
Step1: take your sparkly new taillights and wet sand with a high grit sandpaper, i used 400 and was light, 5-600g would work better
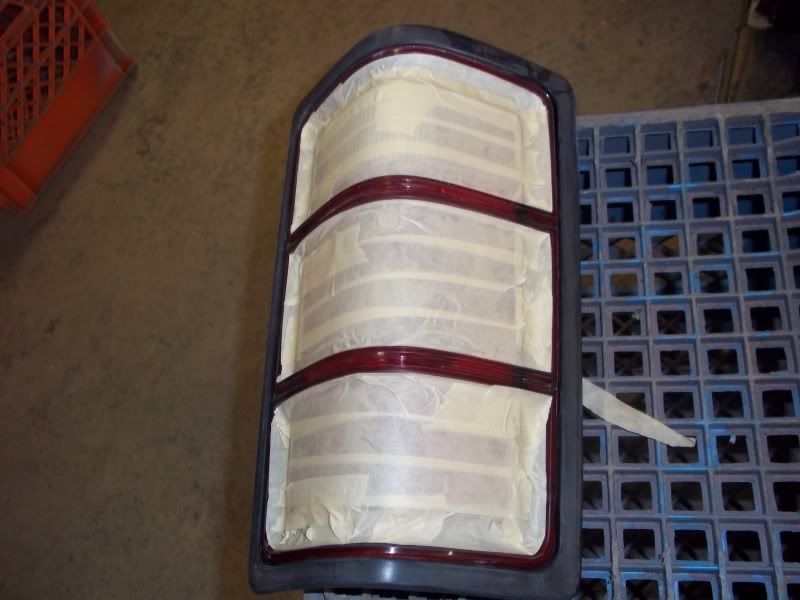
Step2: after cleaning the lights thoroughly, mask off the part you only want tinted, paint goes on first
Step3: Paint, (Do i need to explain?)
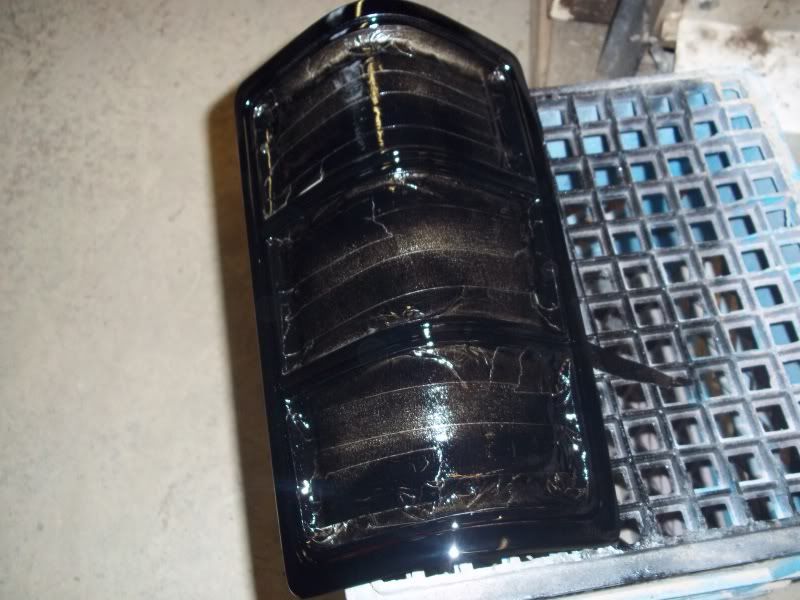
Step4: Set the tail light in a warm place, preferably with a bit of air flow,
Step5: After the paint has cured enough to handle, (give it plenty of extra time) remove mask
Step6: If you used a color other than black, double the cure time... if you used black, go right to step 8
Step7: Mask the painted portion,
Step8: Tint, this is where light even coats are ESSENTIAL.. do it sloppy and it will show
layer one
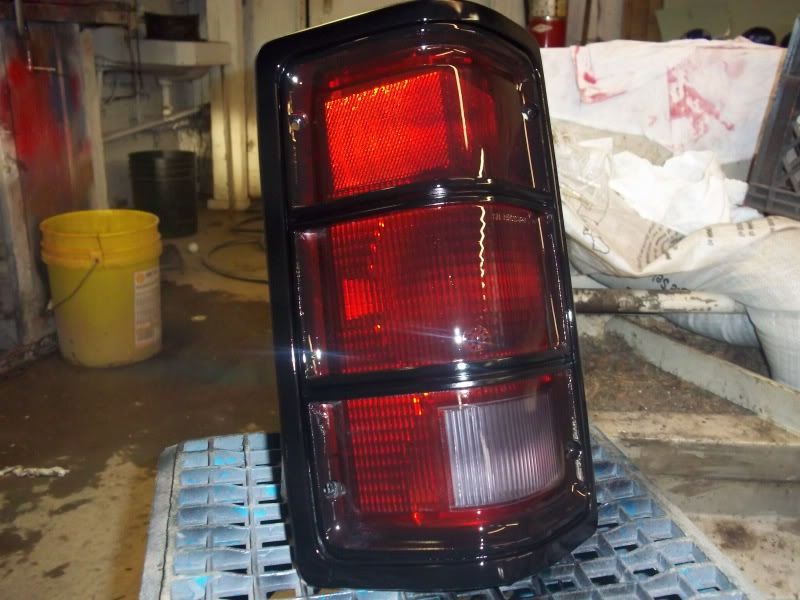
layer two
Step9: again, set in a warm dry place with some kind of air flow... give it a couple hours just to be safe...
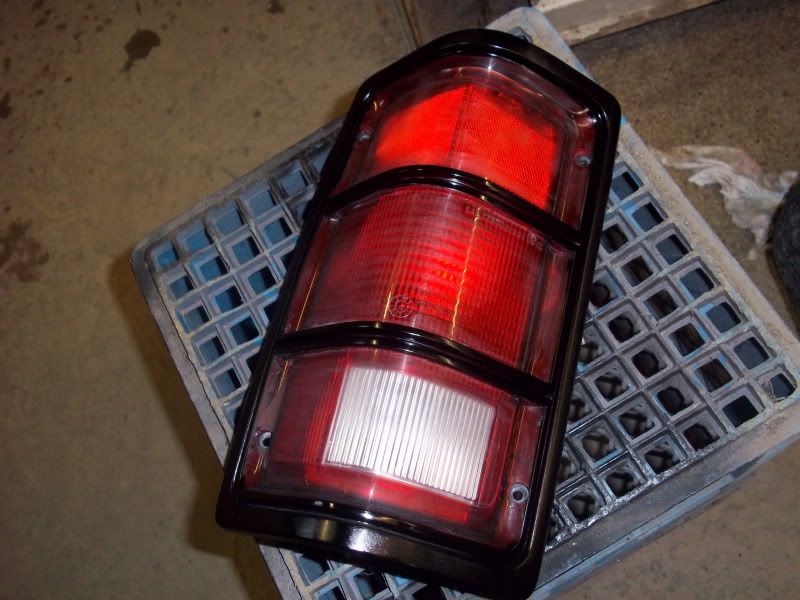
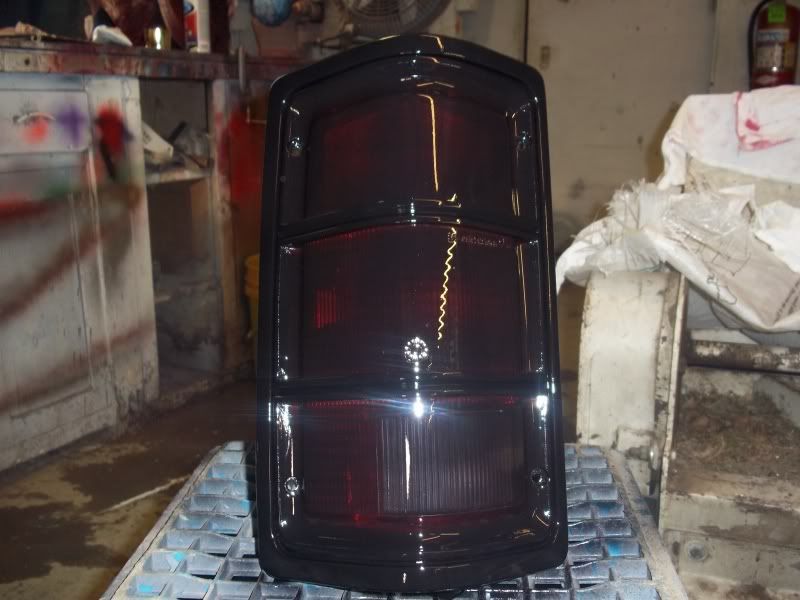
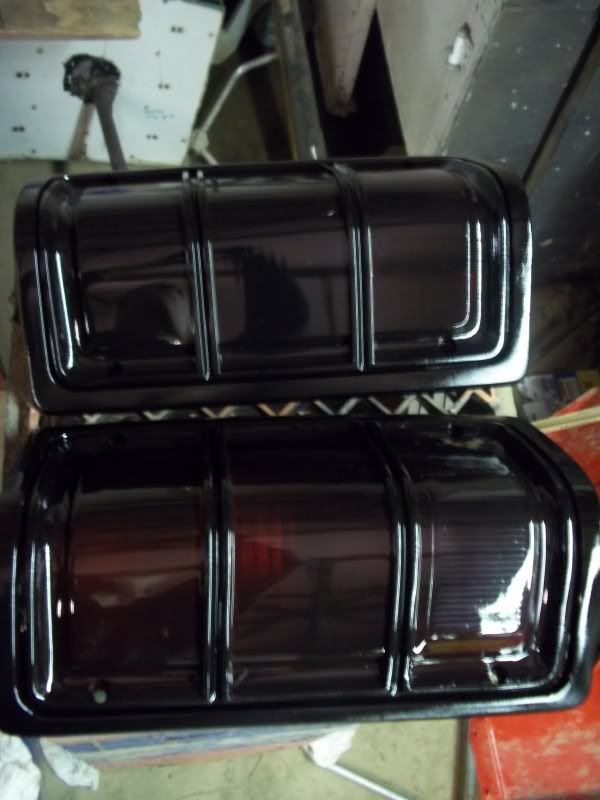
heres the comparison
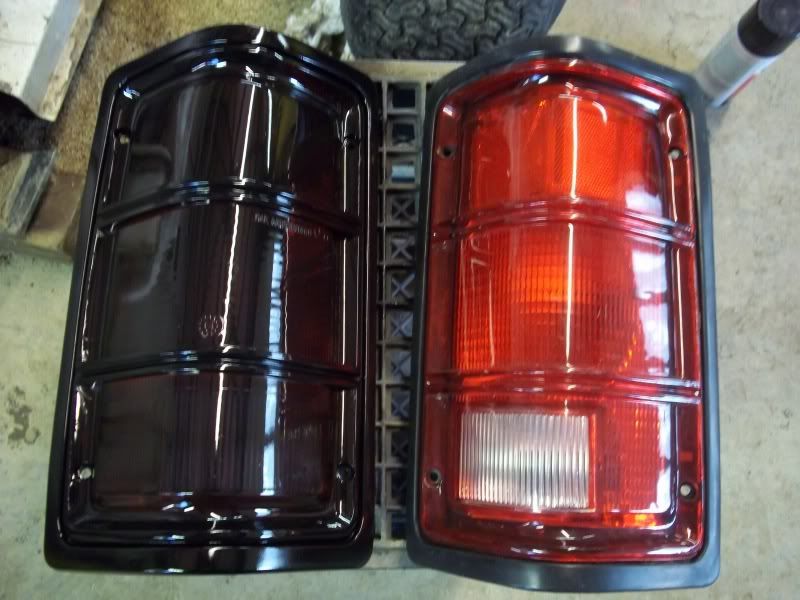
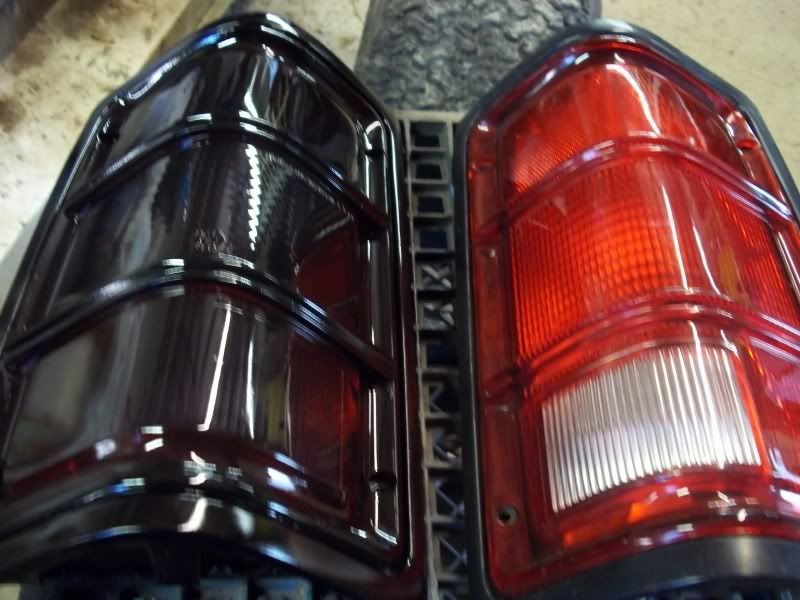
and finally
you cant see it in these pics but the outer side of mine i tinted a third time, no light goes that way anyways ( if you look close in the last one you can kinda see it)
 Topic: DIY: Painted to match / tinted tail lights (Read 2156 times)