With this tutorial, you'll be able to turn an image into a black and white line drawing. The end result is a single color drawing that can be applied to clothing or even used as a logo.
step 1open your image in photoshop. In this case, were using an image from Buzzy's gallery.
 step 2
duplicate the background layer by selecting it and hitting
ctrl+j.
 step 3
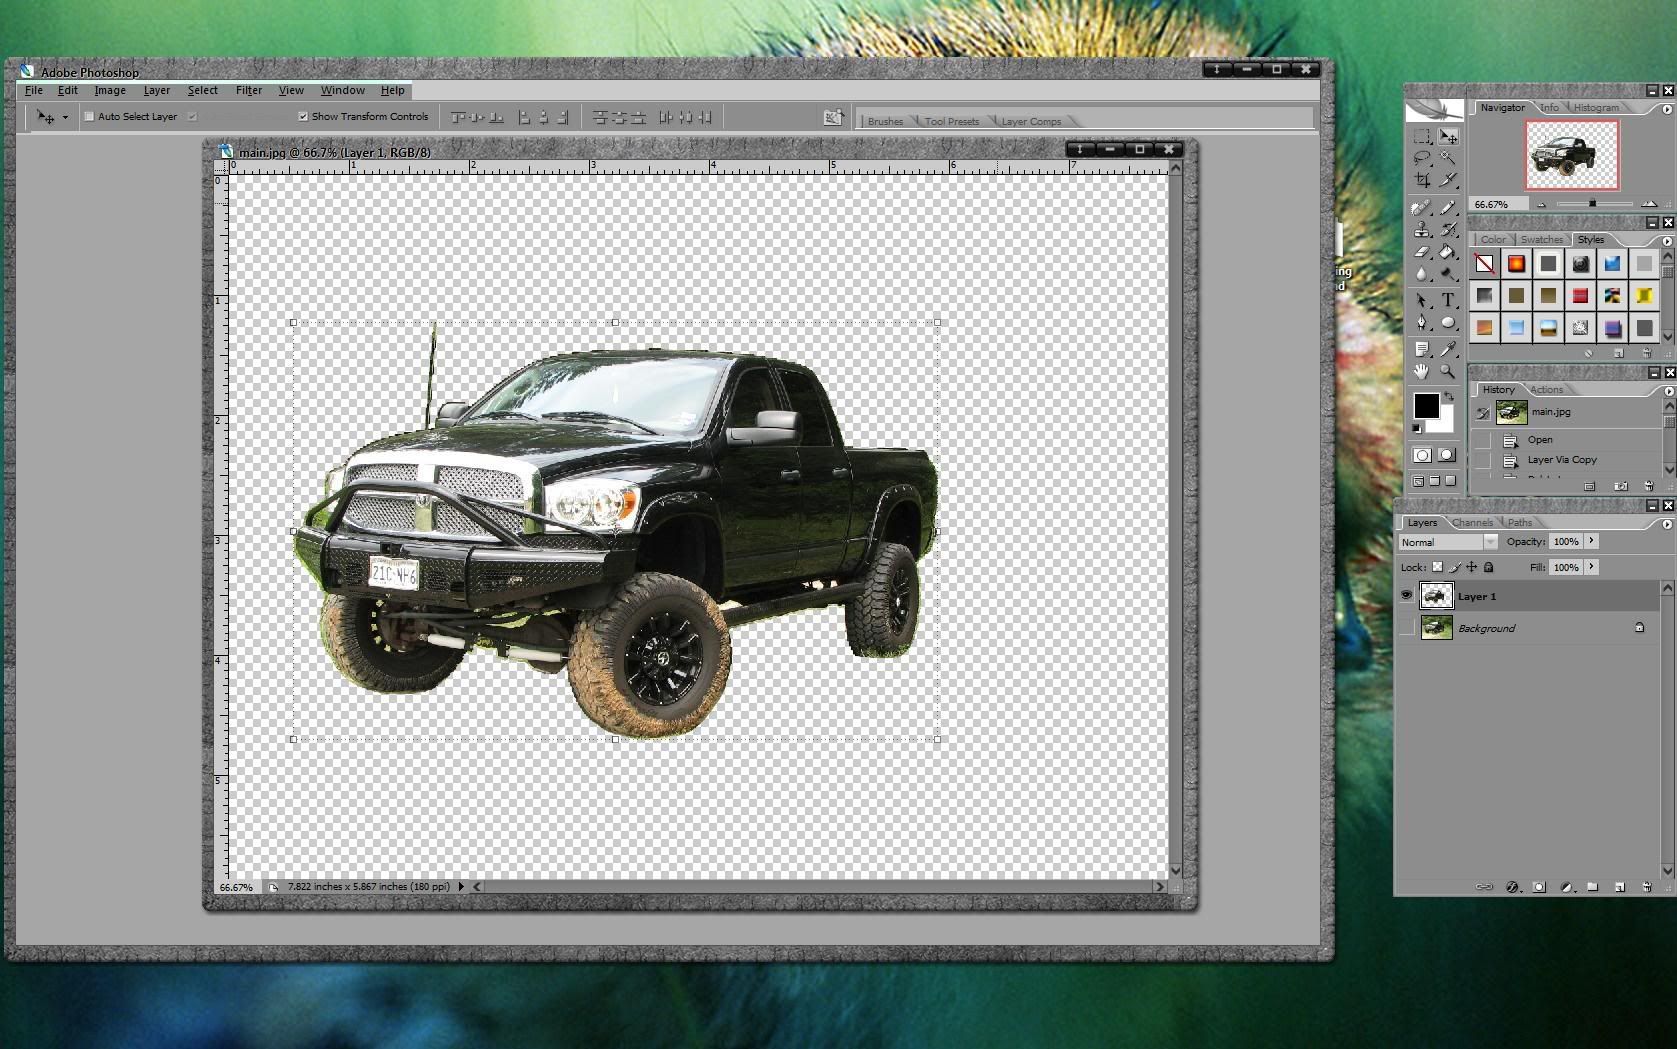
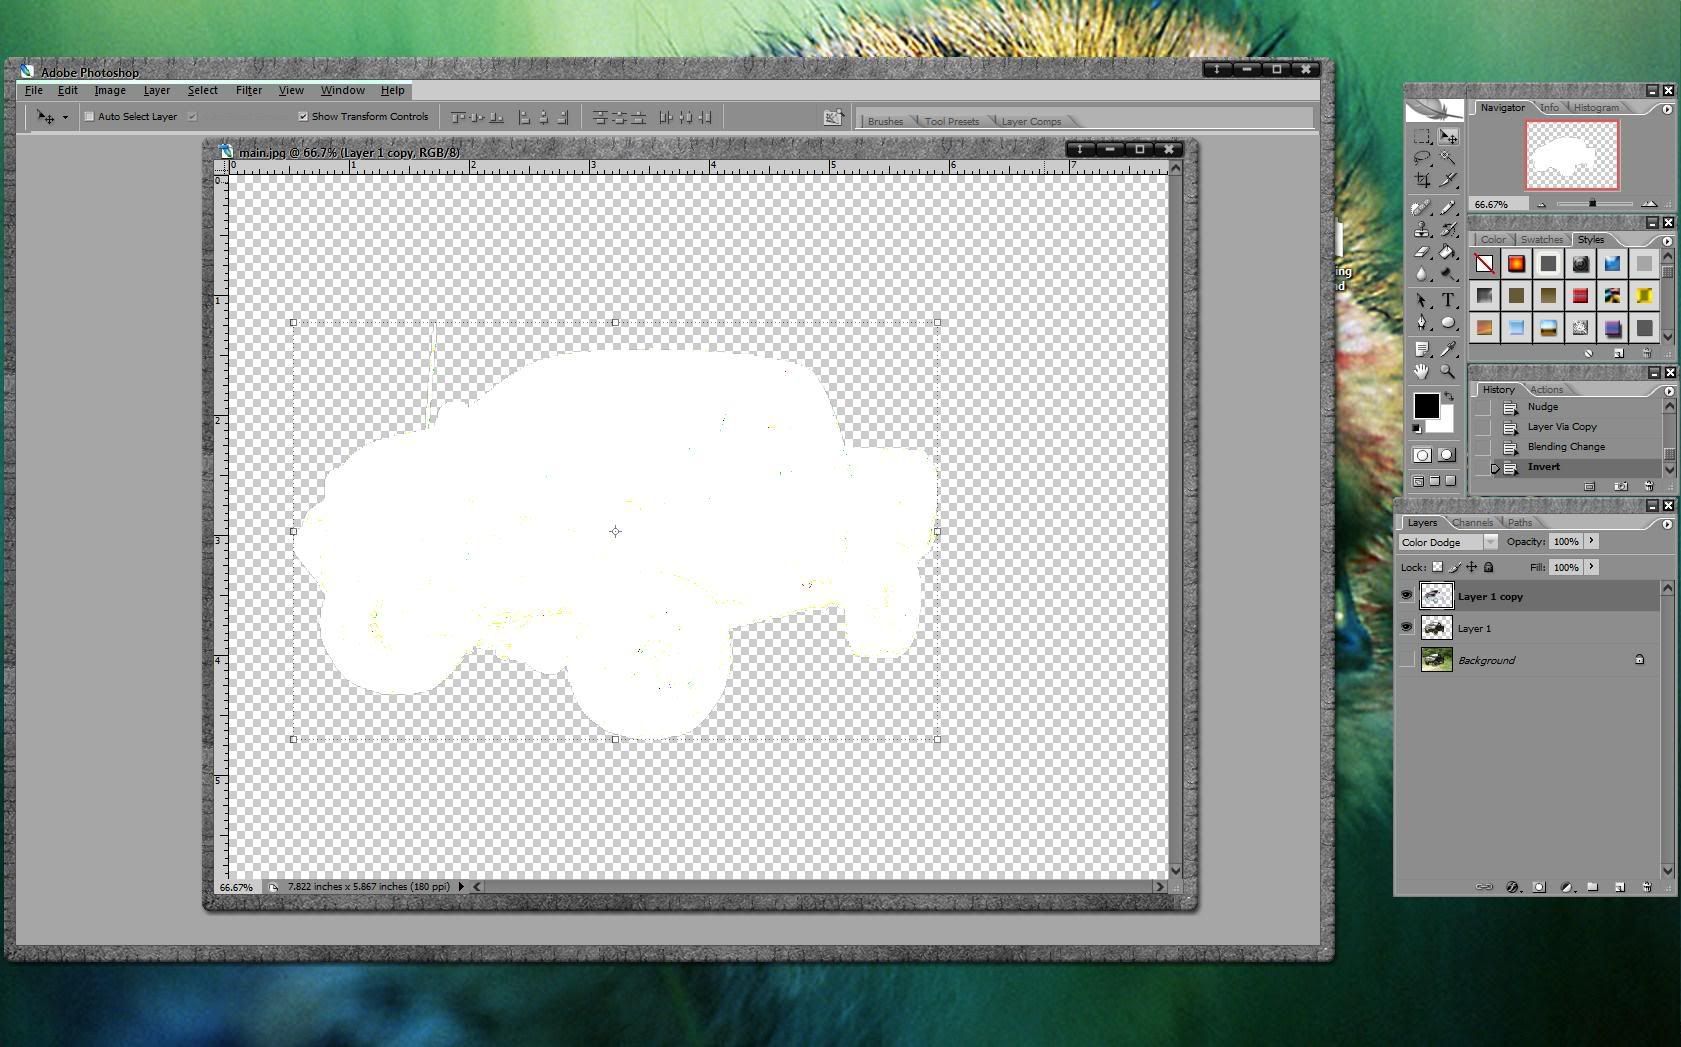
hide the background layer by clicking the little eye next to it in the layer panel. Now, use an erasure and remove the background from our new layer ('Layer 1'). When you are done you should end up with something like this. Notice that I didn't spend a lot of time getting a precise cutout of the truck. You really don't need a precise cutout since the end result is a 2 color image.
 step 4
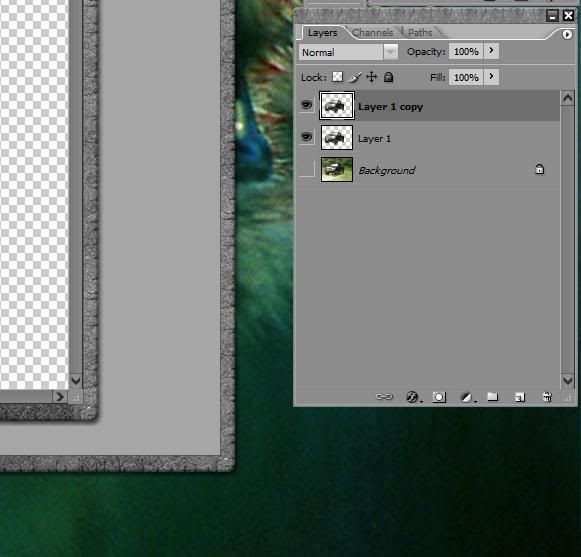
duplicate our cutout layer ('layer 1') by selecting it and hitting
ctrl+j. The layer panel should now look like this.
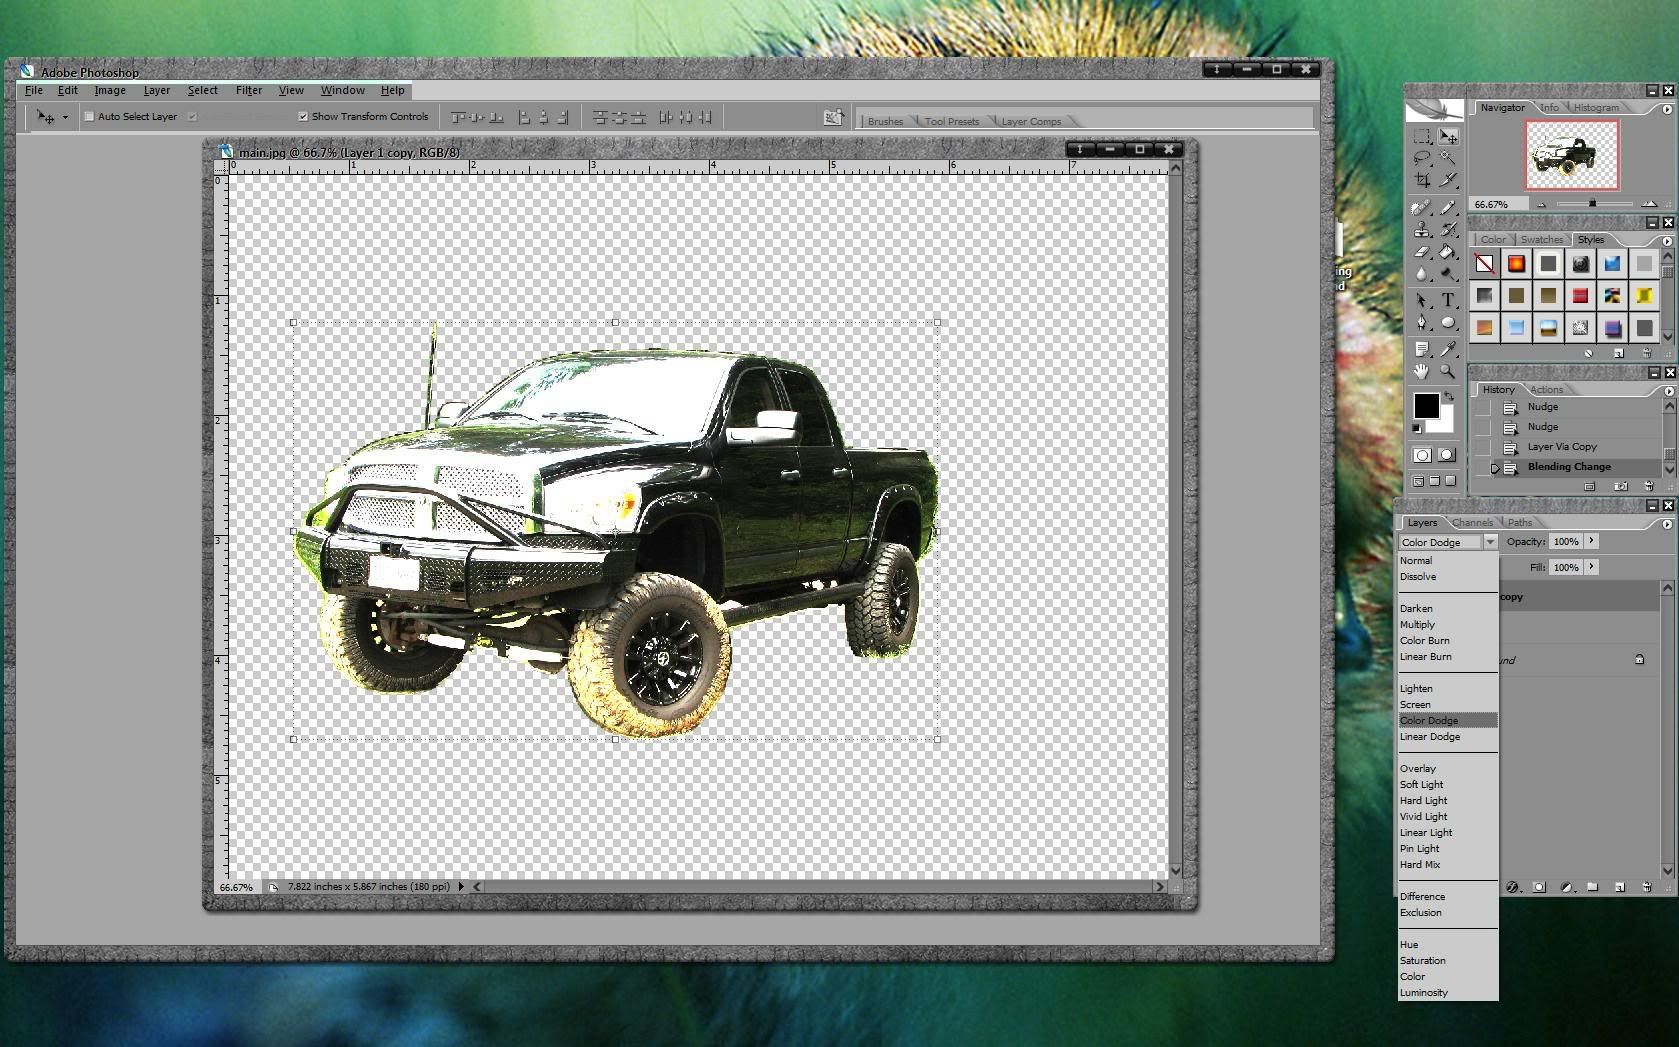
 step 5
select the new layer ('Layer 1 copy') and set the blending option to
color dodge.
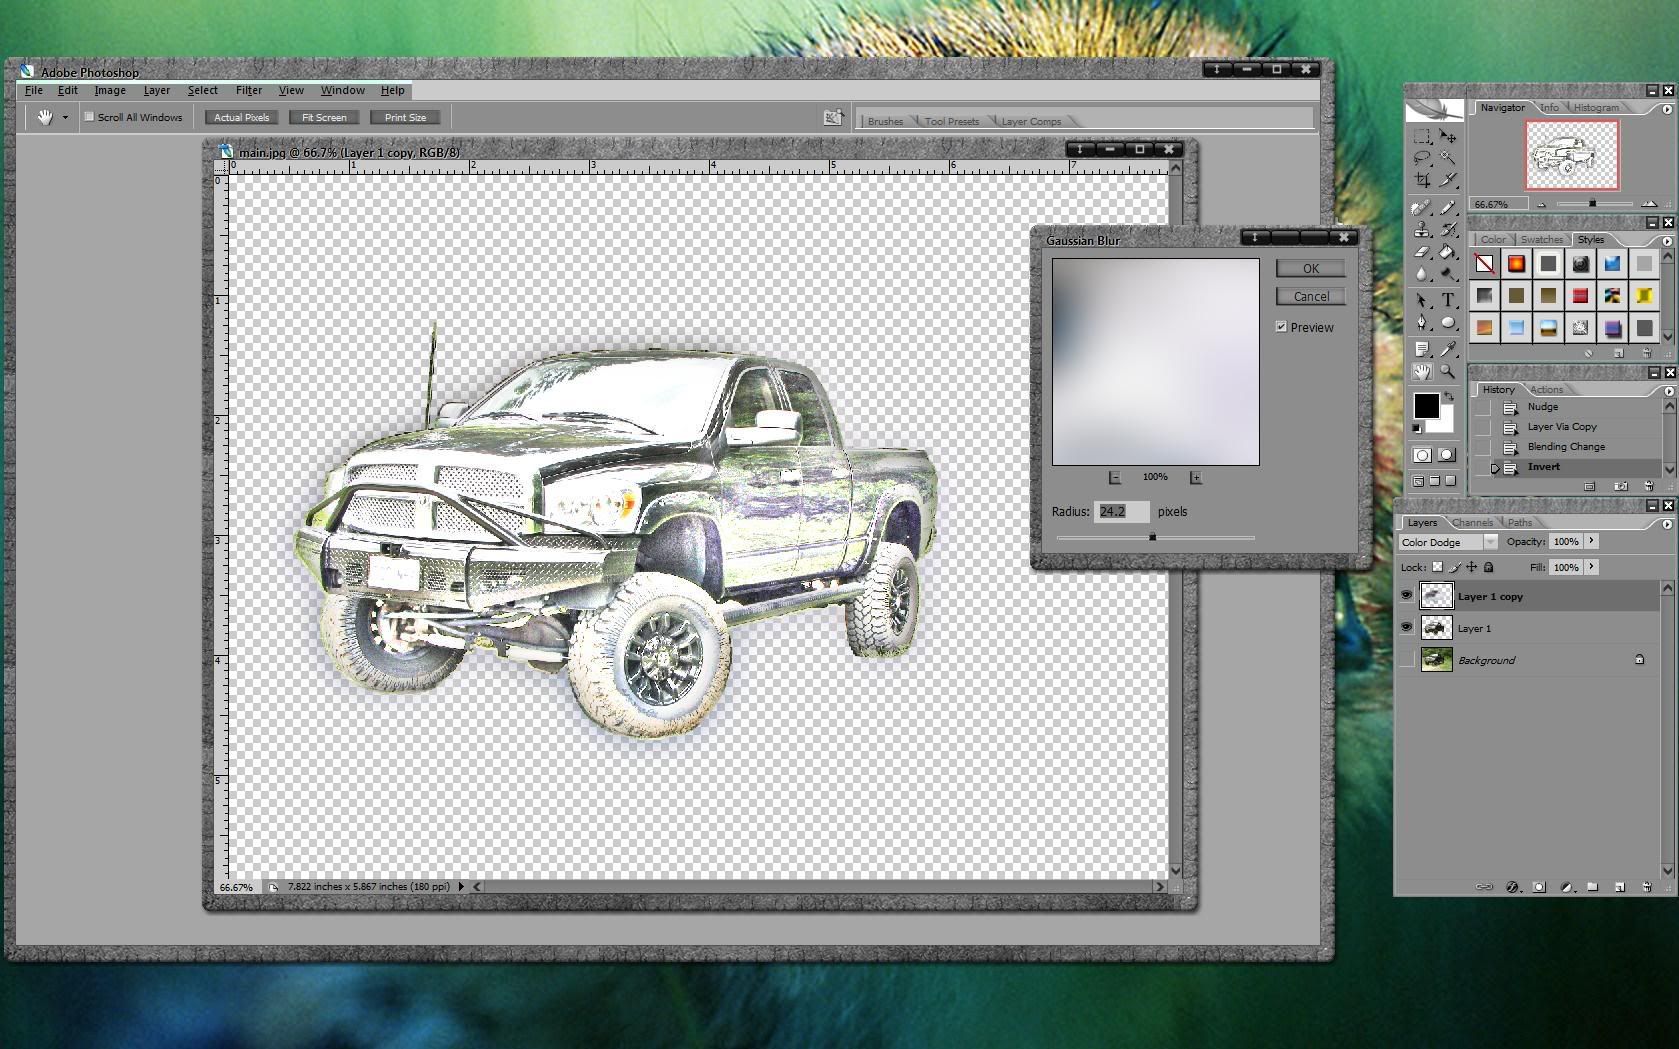
 step 6
with 'Layer 1 copy' still selected, hit c
rtl+i to invert the image.
 step 7
now we are going to apply a gaussian blur filter to the inverted layer ('Layer 1 copy'). Select the layer and select
filter>blur>gaussian blur. Adjust the pixel radius until a little color starts showing in the image. Here, I've used a 24.2 pixel radius to get some color to the hood and upper edge of the image.
 step 8
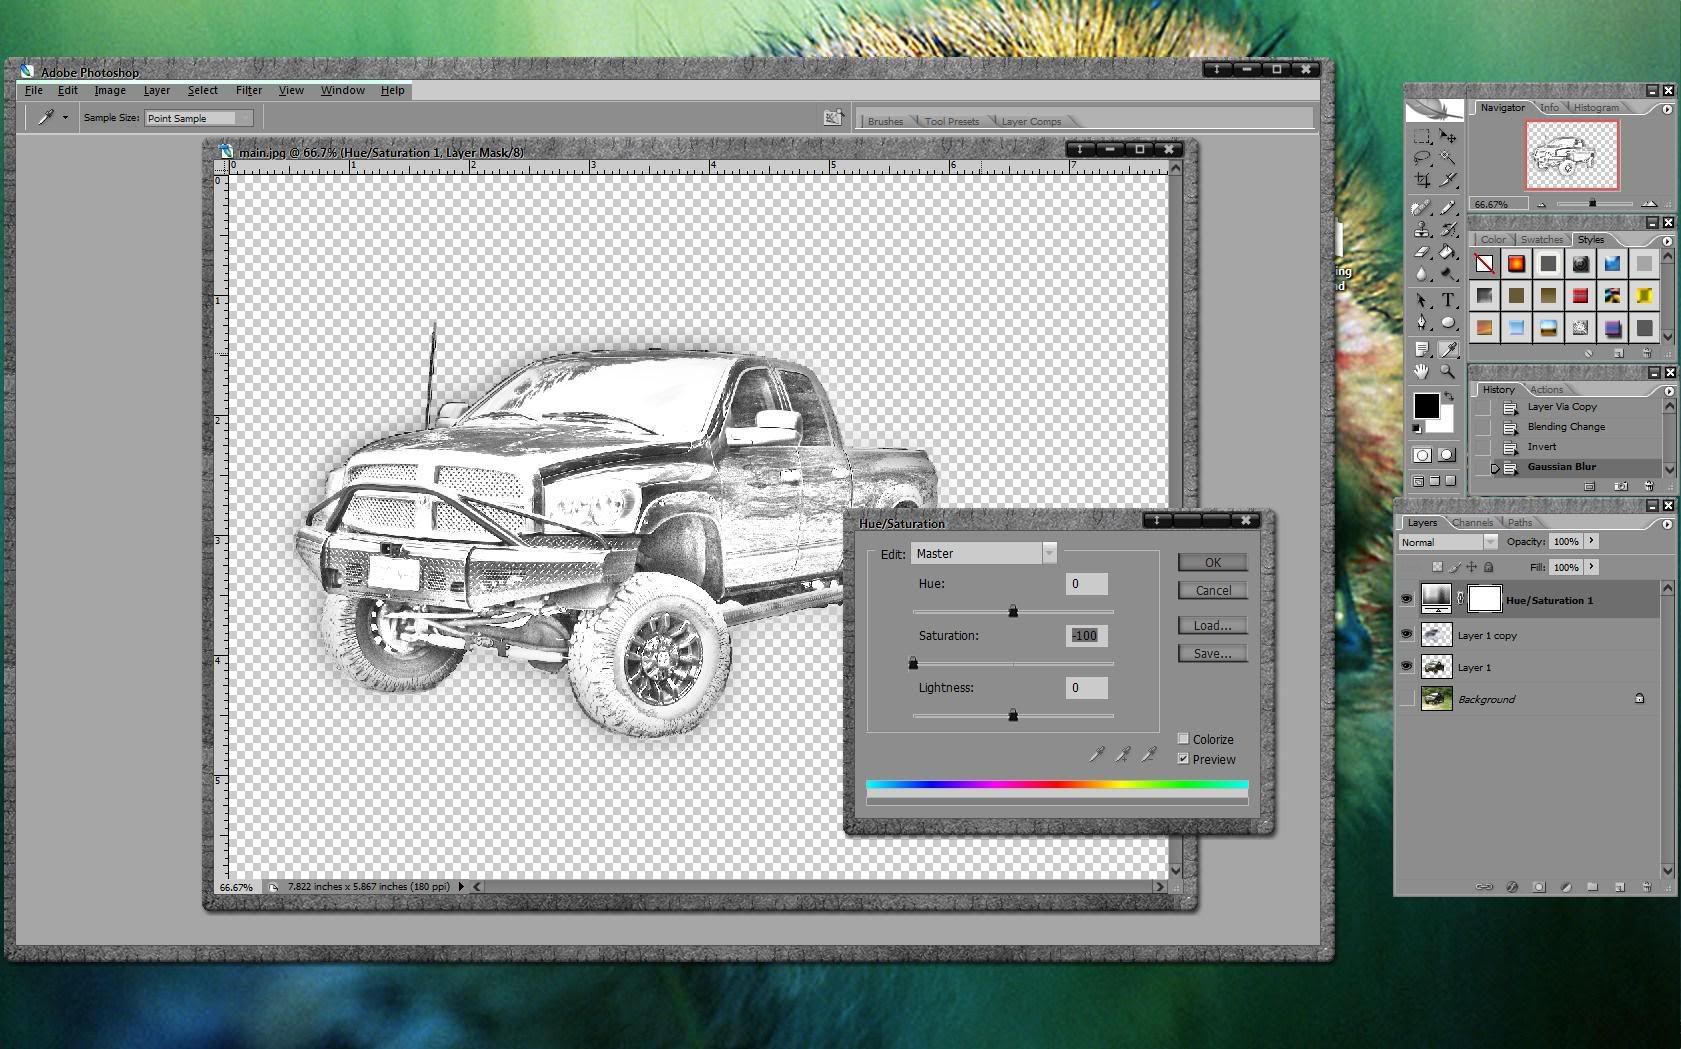
now add a hue/saturation layer above 'Layer 1 copy' and set the saturation to a value of 0. This will give us a grayscale image.
 step 9
create a new layer and fill it with a white color. Then slide this layer to just above the background layer. This will give us a nice white background for our black line drawing.
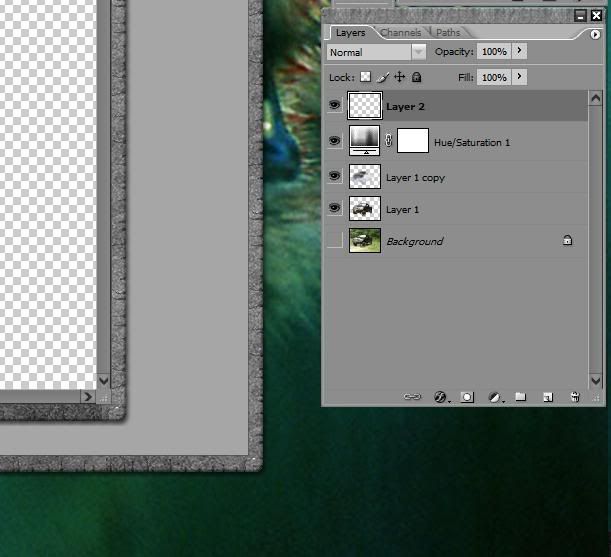
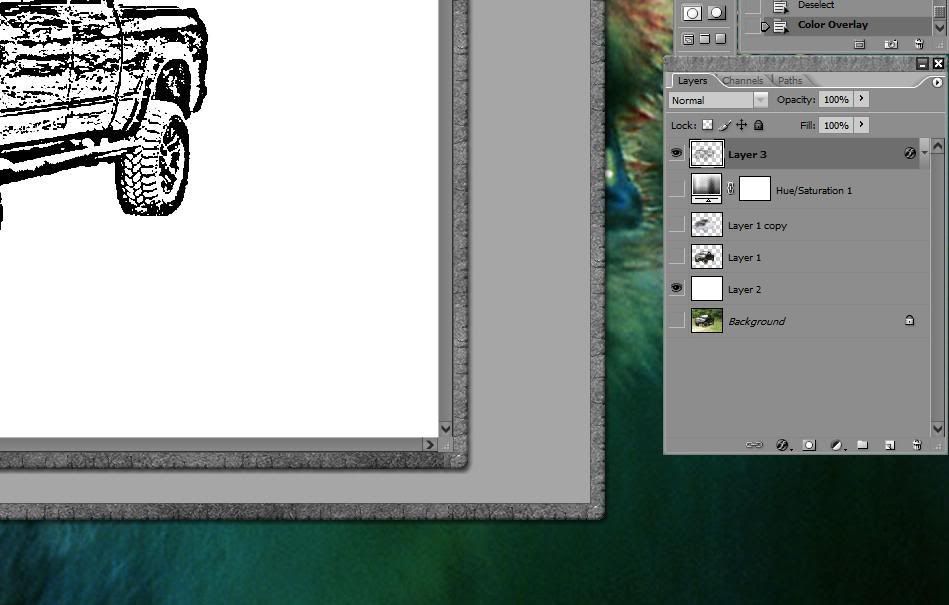
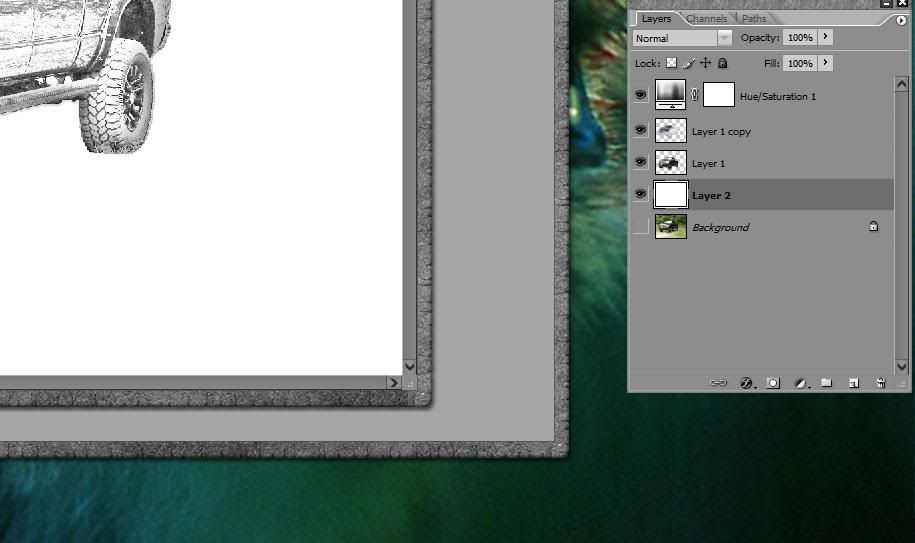 step 10
create another new layer and place it at the top of the layer panel. The layer panel should look like this.
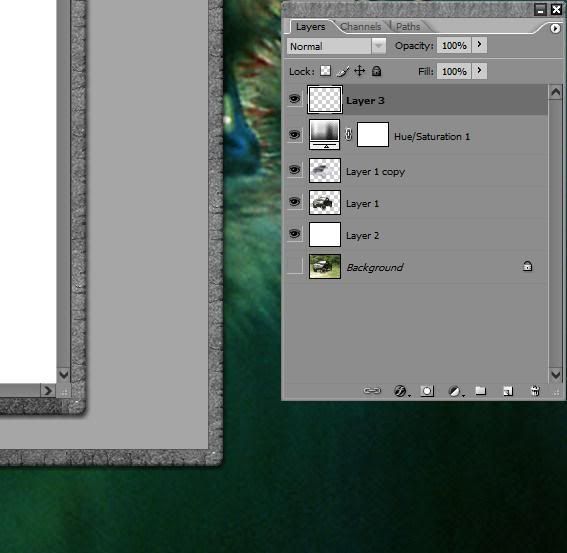 step 11
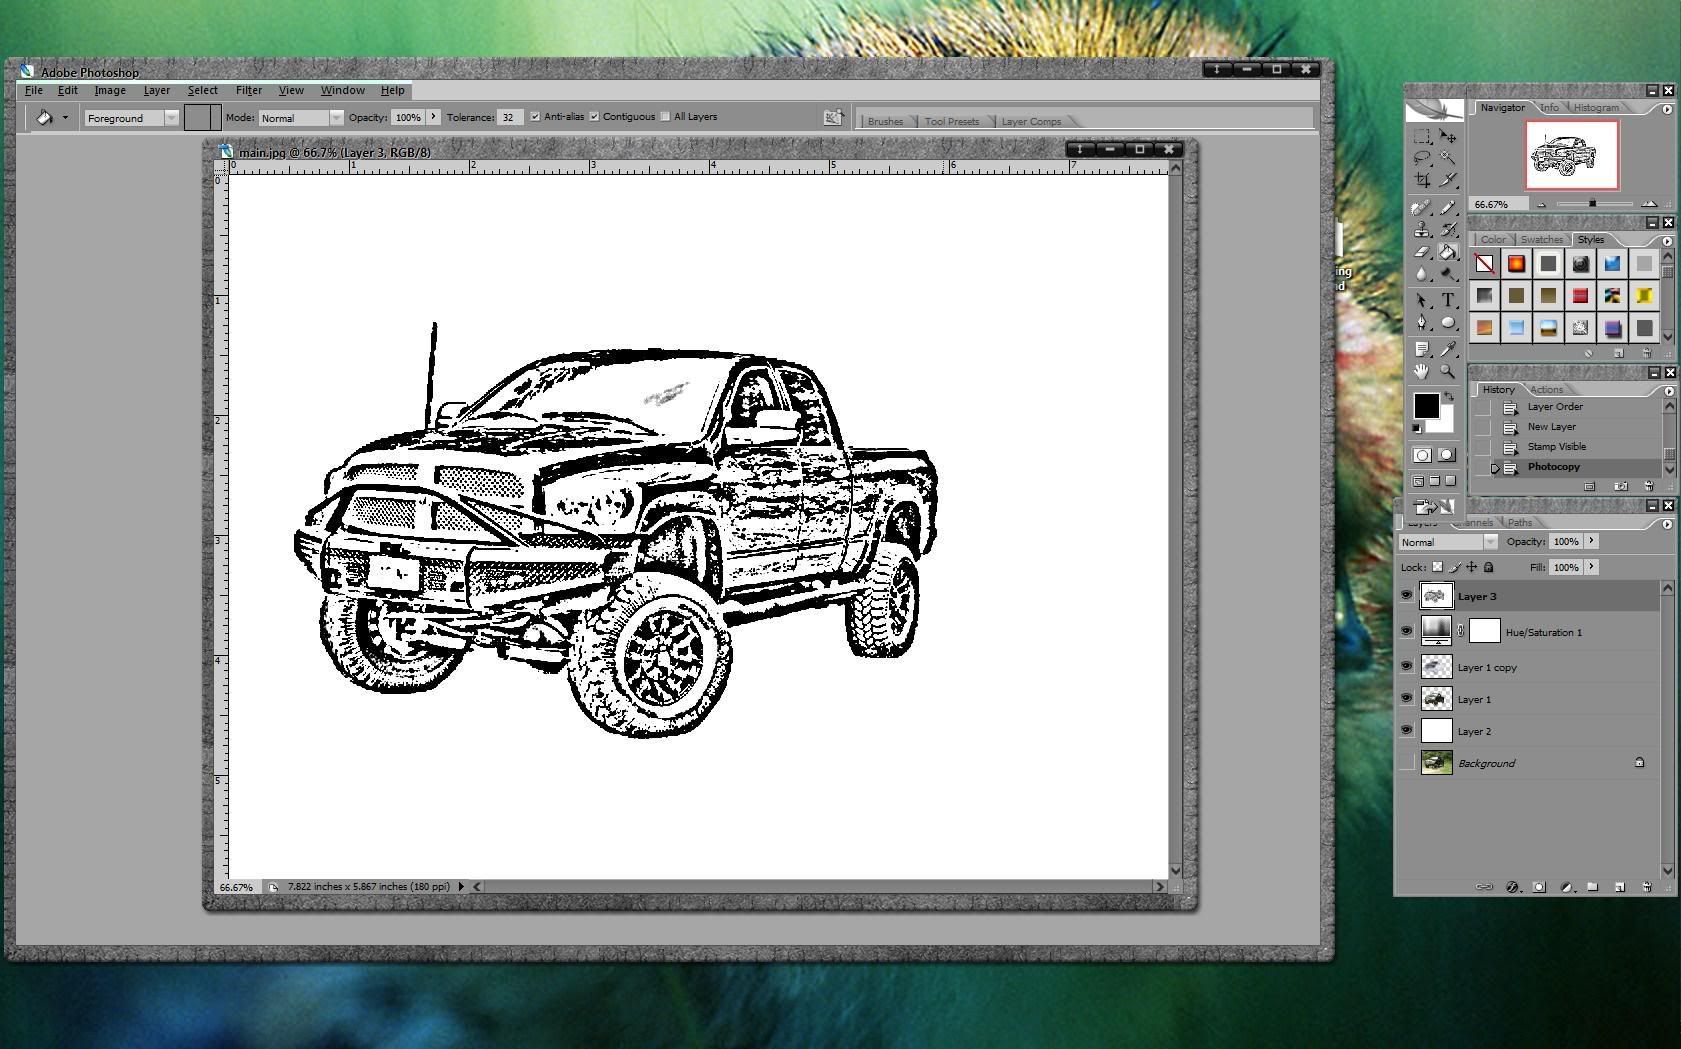
with the new layer ('Layer 3') selected, press
ctrl+shift+alt+e. This will take a copy the image as seen and paste it into the new layer.
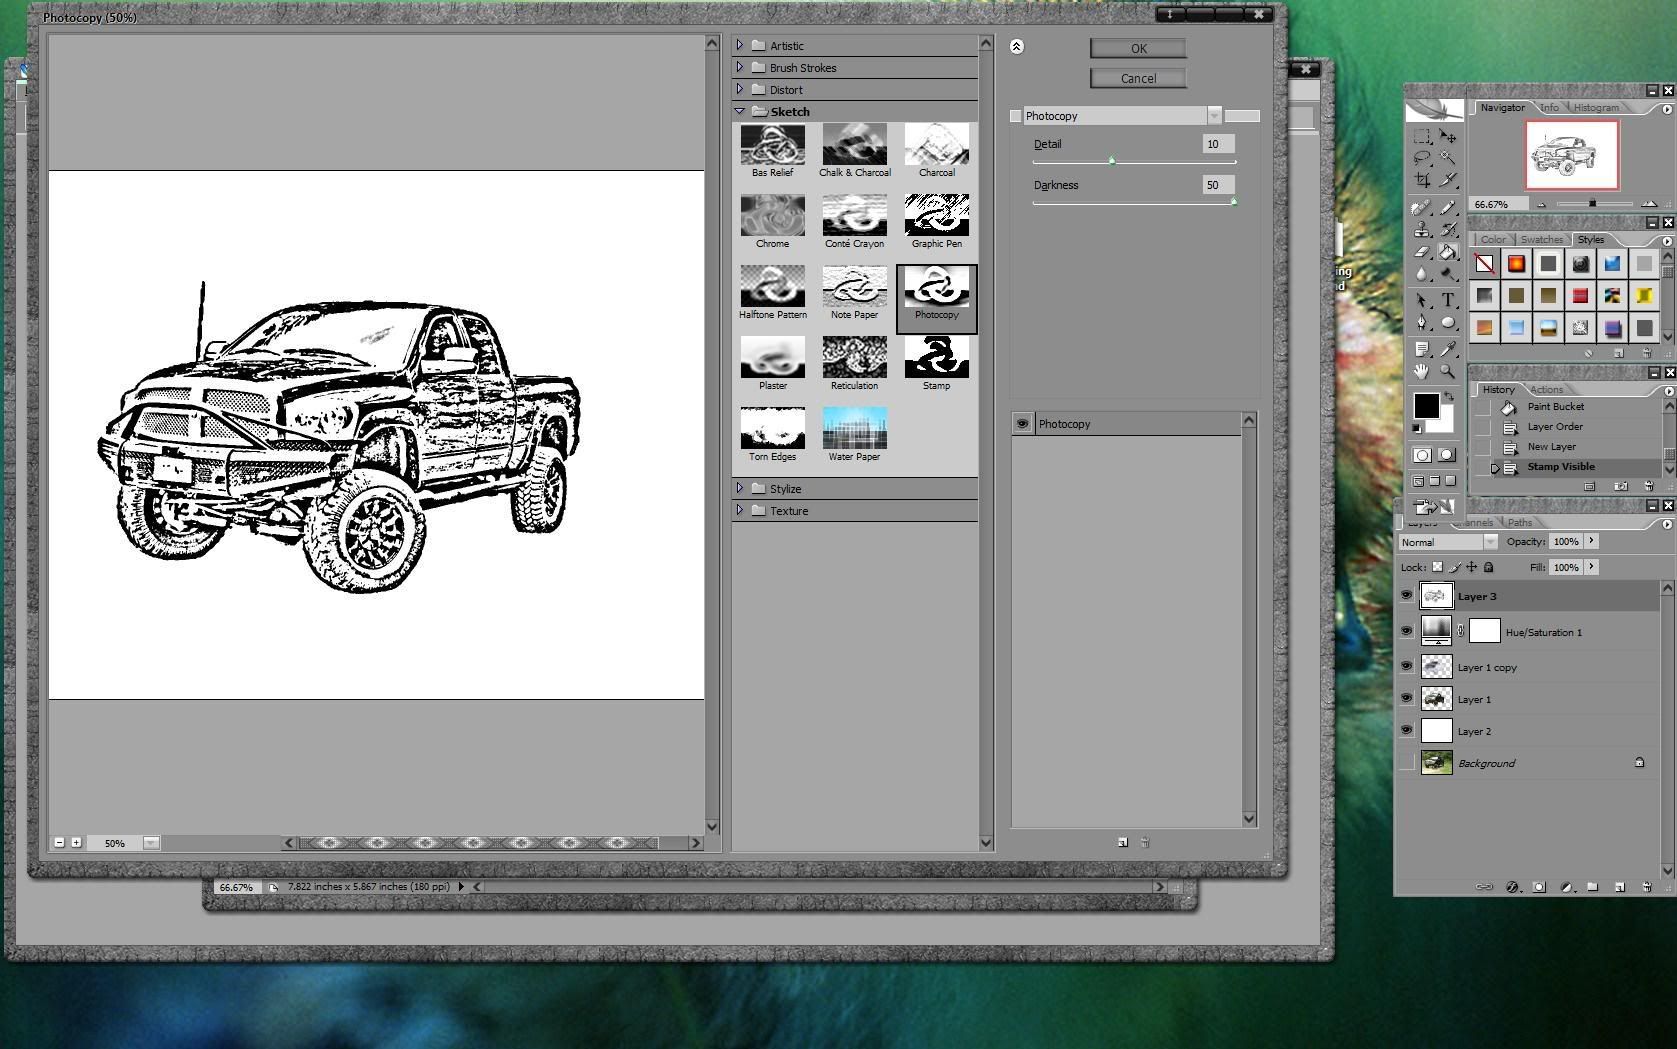
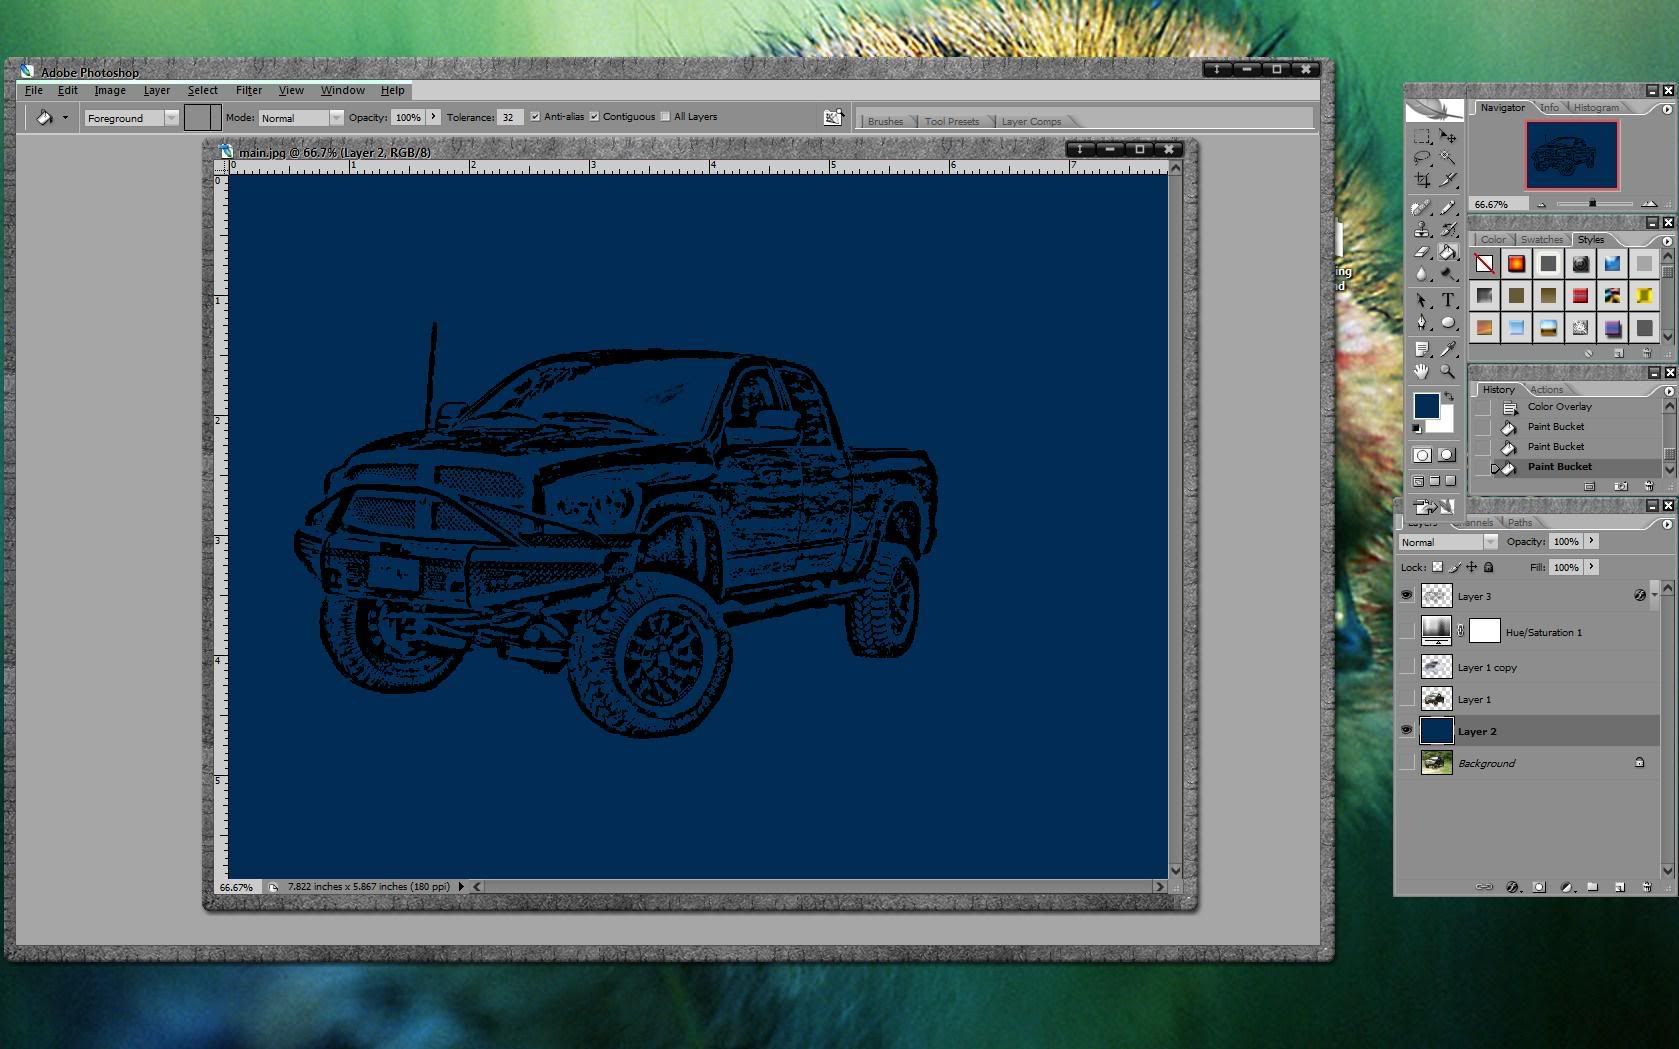
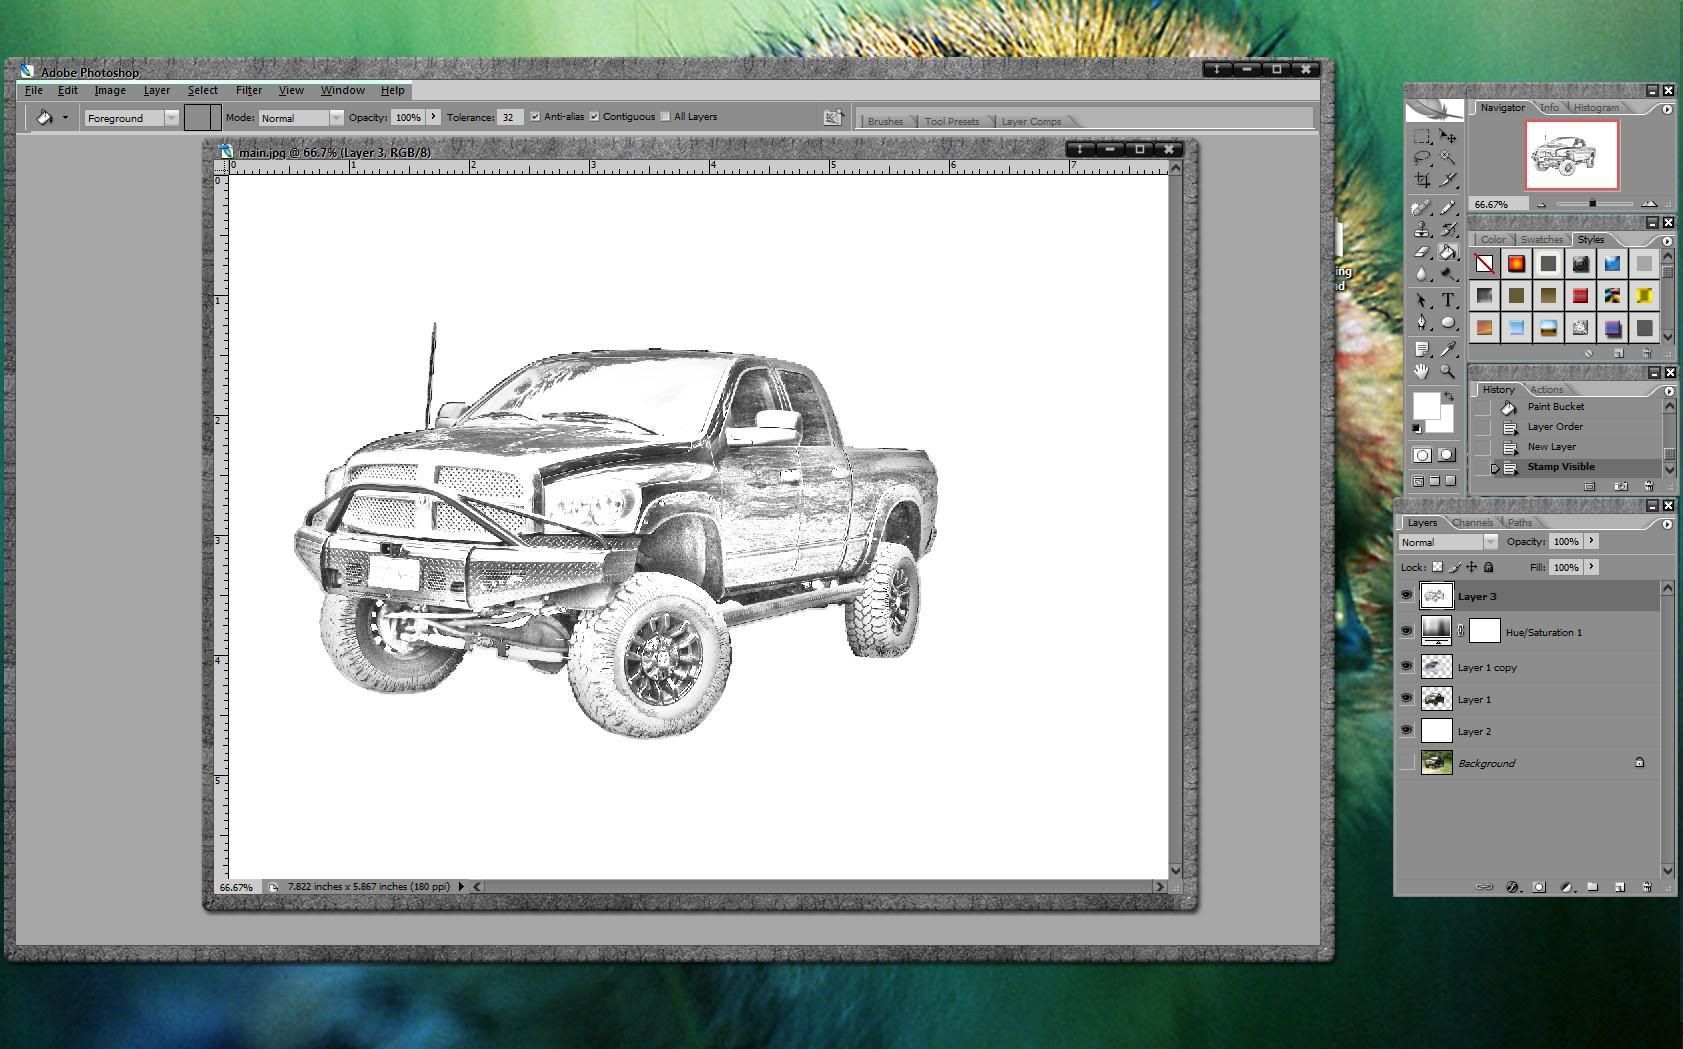 step 12
make sure you have black selected for a foreground color and white selected for a background color. Then apply a photocopy filter to the new layer ('Layer 3') by selecting
filter>sketch>photocopy. Adjust the settings to get an image that you like. Here, I've used detail 10 and darkness 50.
 side note
if we hadn't cut the truck out of the background in step 3, we would have ended up with this in step 12.
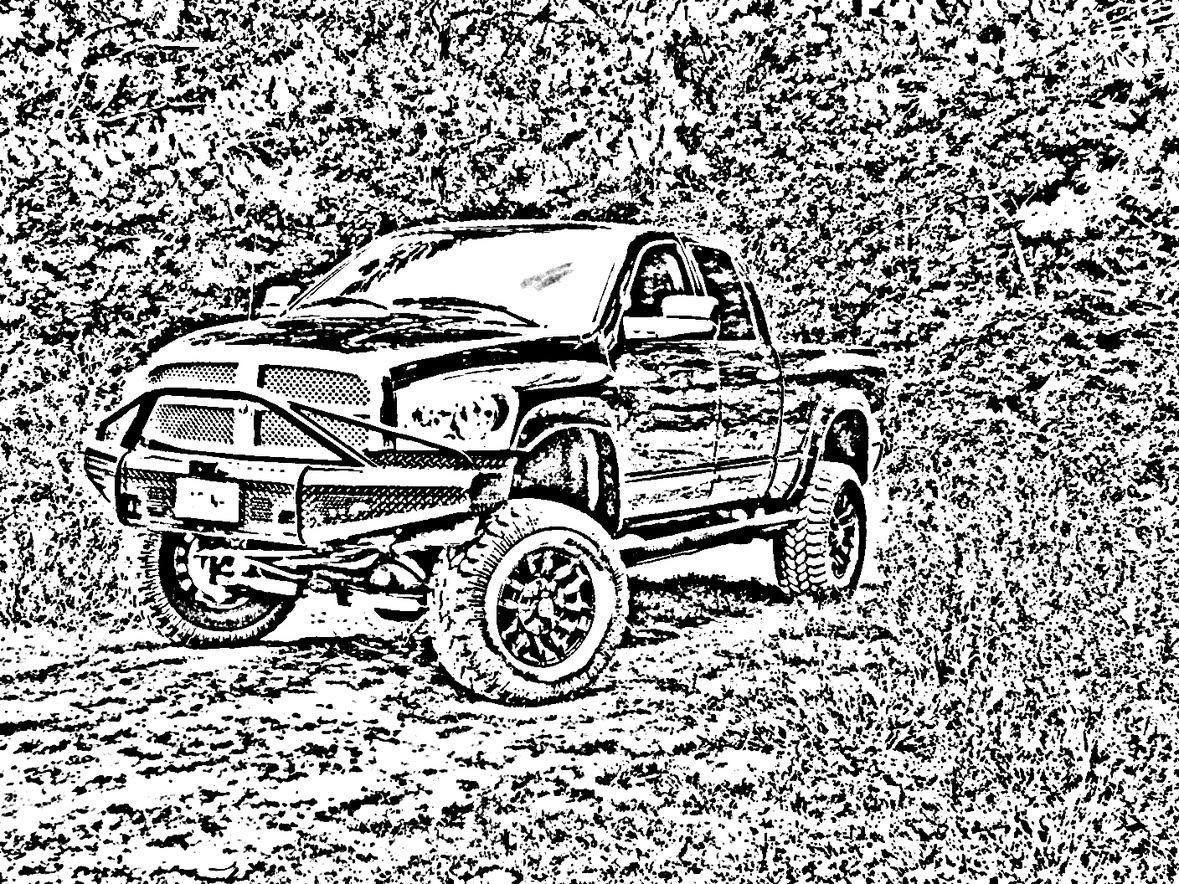
cutting out the truck allowed us to get this much cleaner looking image.
 step 13
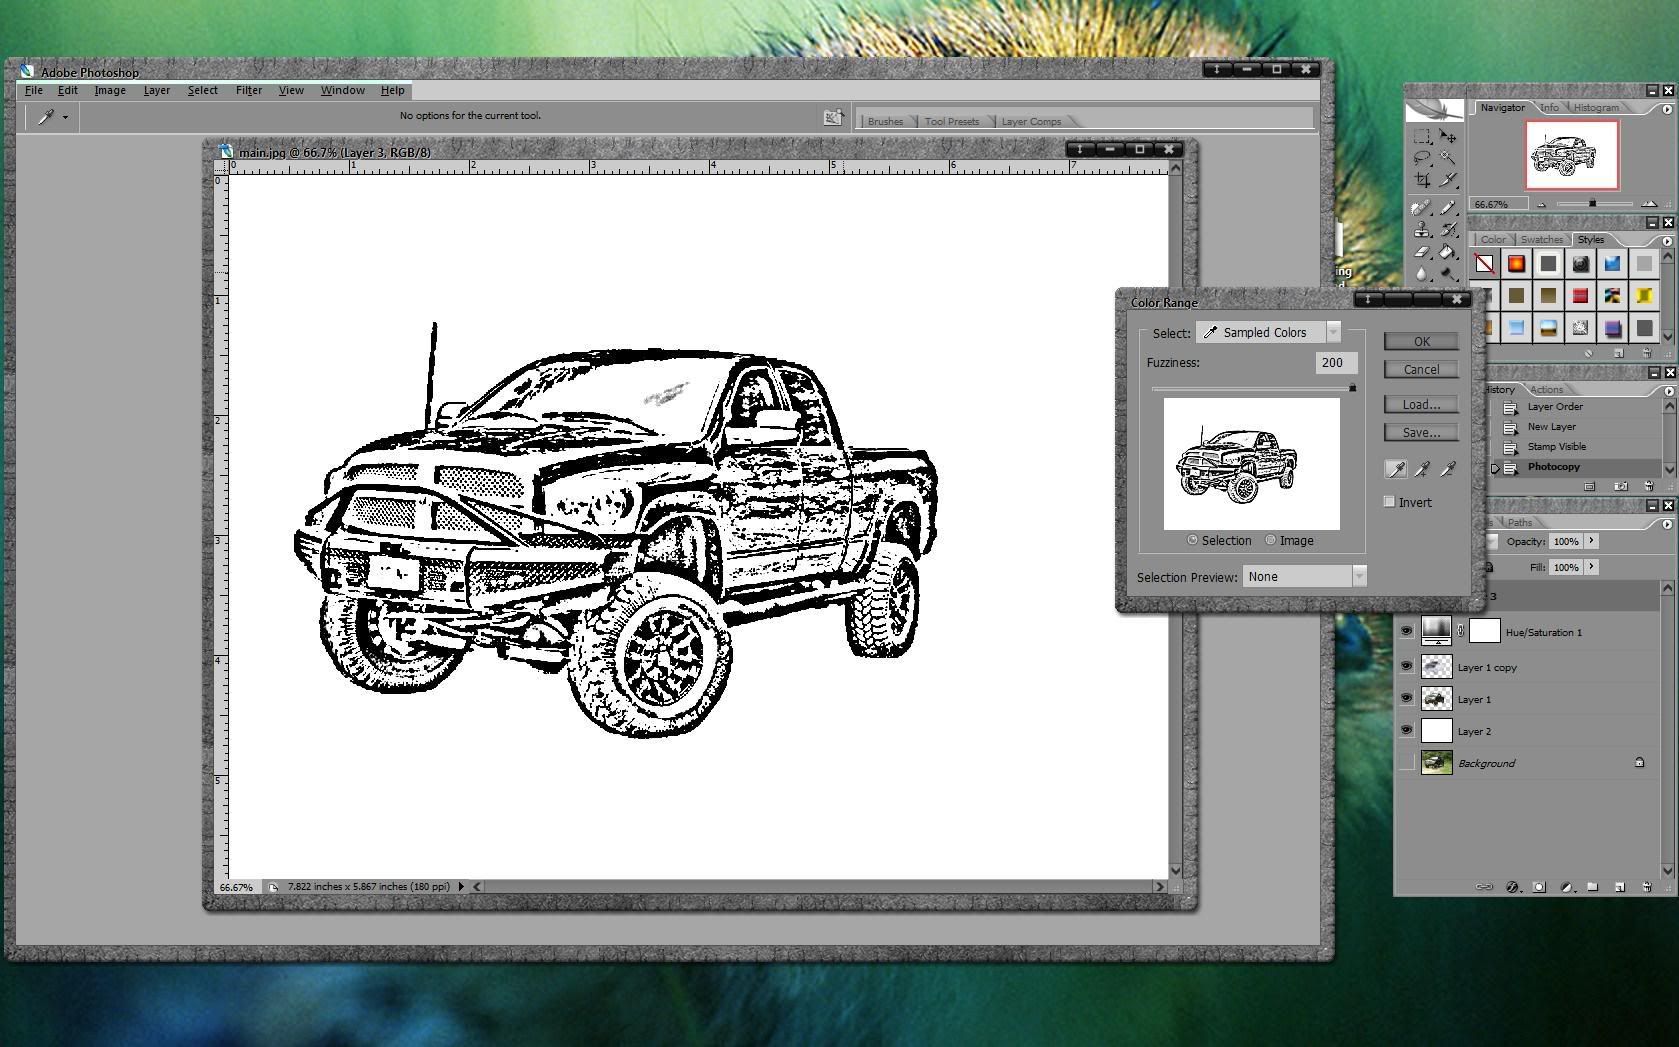
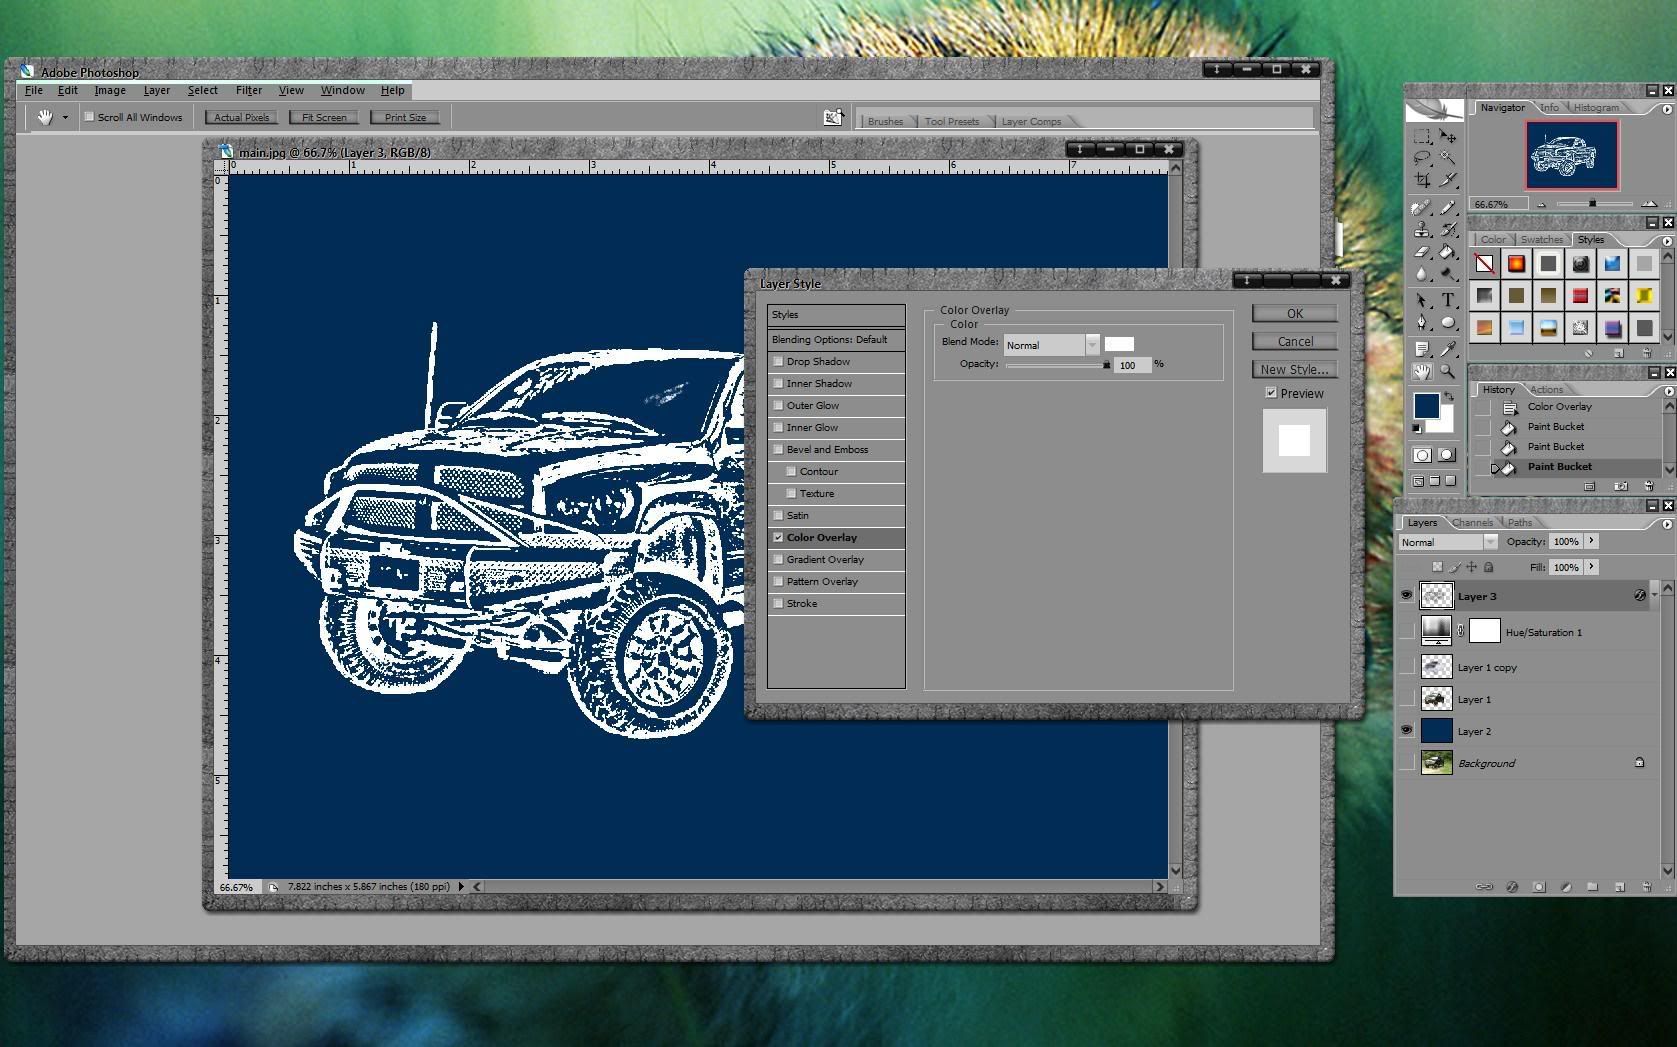
now we want to separate the black drawing from the white background. This way, we can put the drawing over any background we want and can change its color. With our black and white line drawing layer selected ('Layer 3'), select
select>color range from the menu bar. Then click anywhere that is white and select okay.
 step 14
now press
del to remove the white background from the layer.
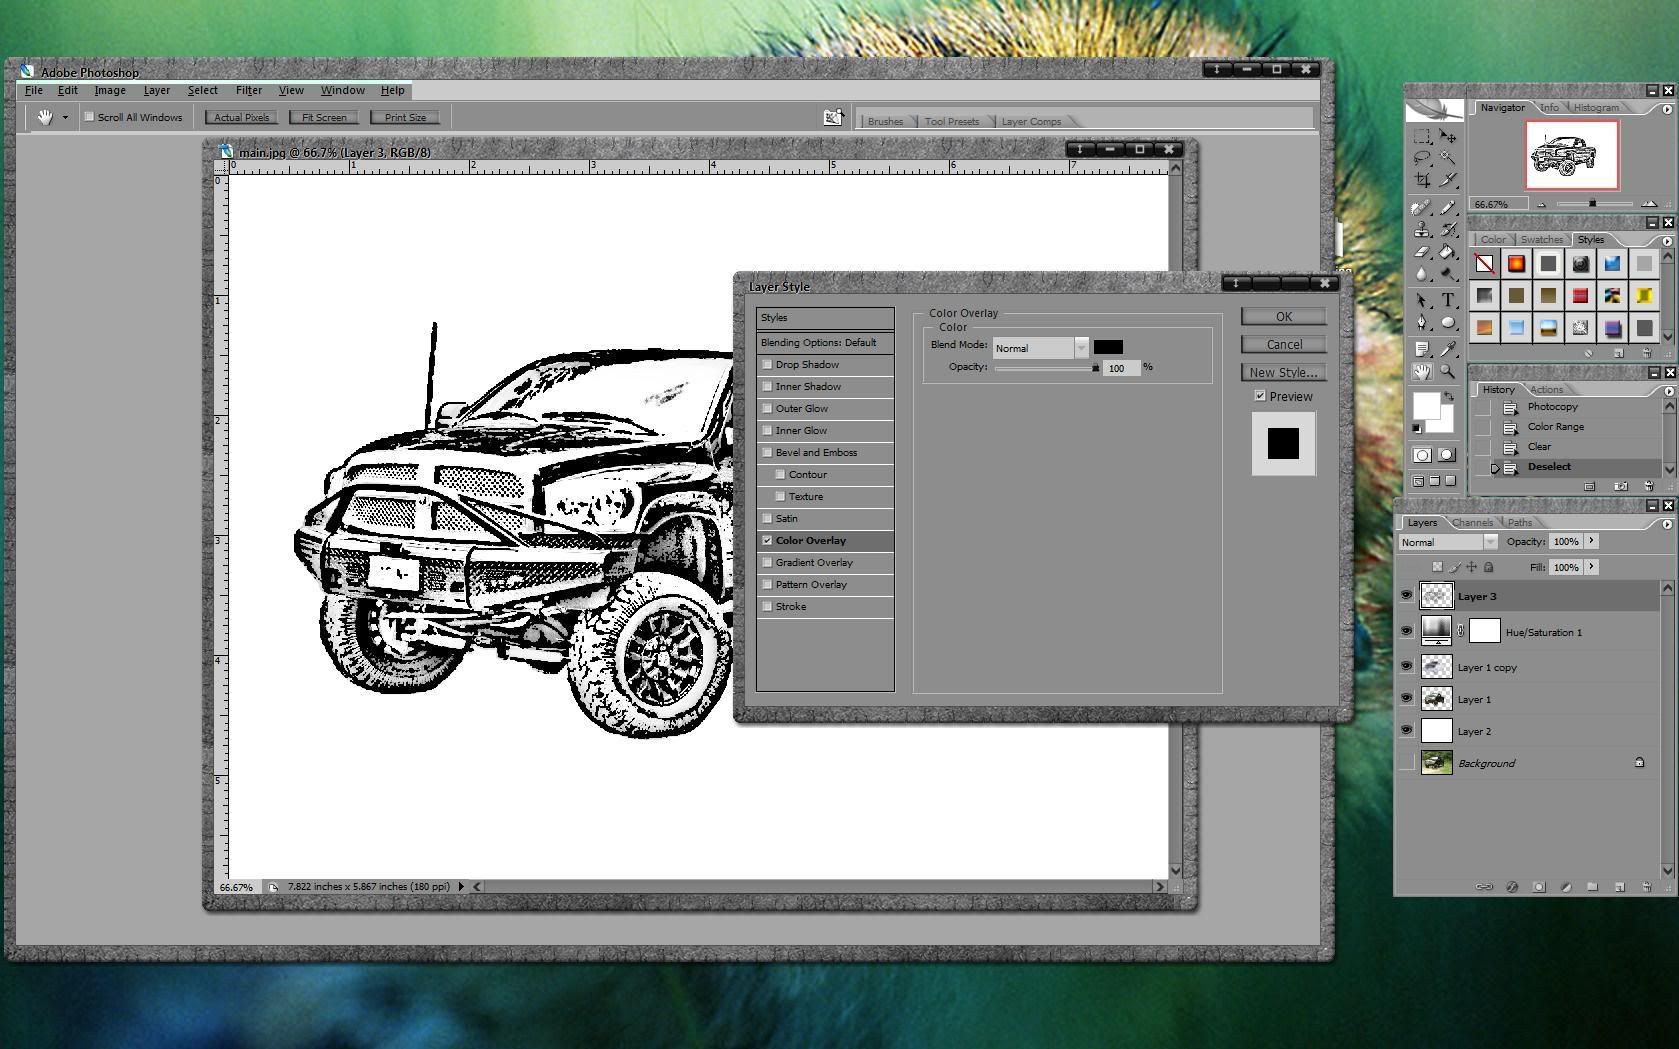
step 15the selection and deletion process rarely does a perfect job. There is usually some white "noise" on our black drawing. To hide this, right click on 'Layer 3' and go to
blending options. Add a color overlay and change the overlay color to black.
 step 16
now hide all the intermediate layers. Click the little eye next to 'Layer 1', 'Layer 1 copy', and 'Hue/Saturation 1'.
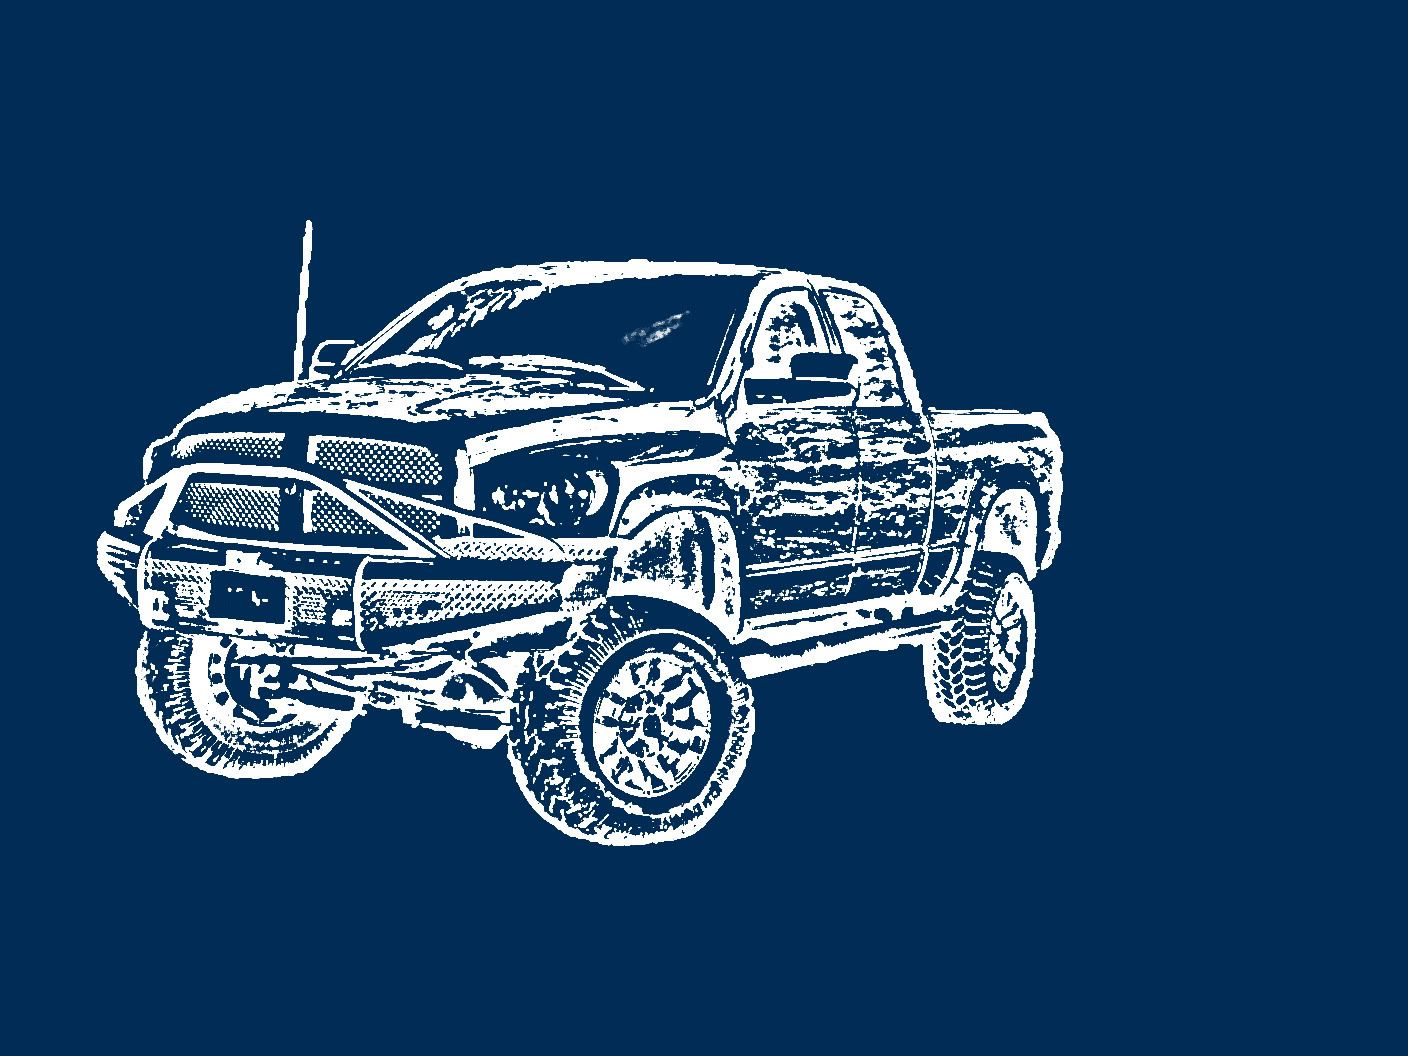
Here is what your image should look like.
 Additional steps
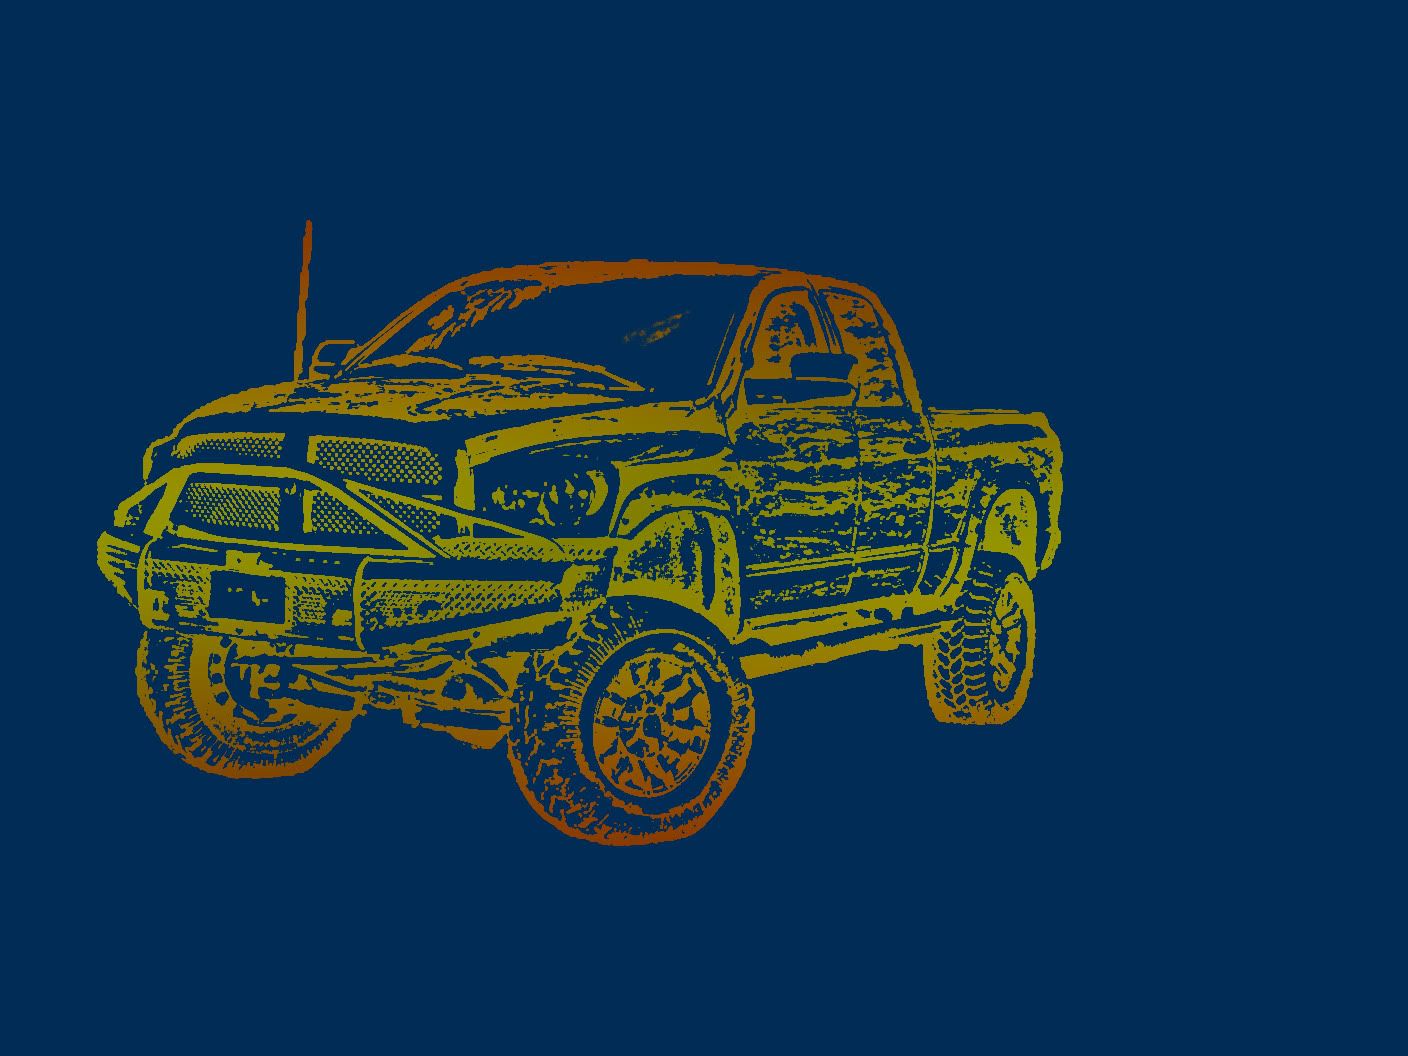
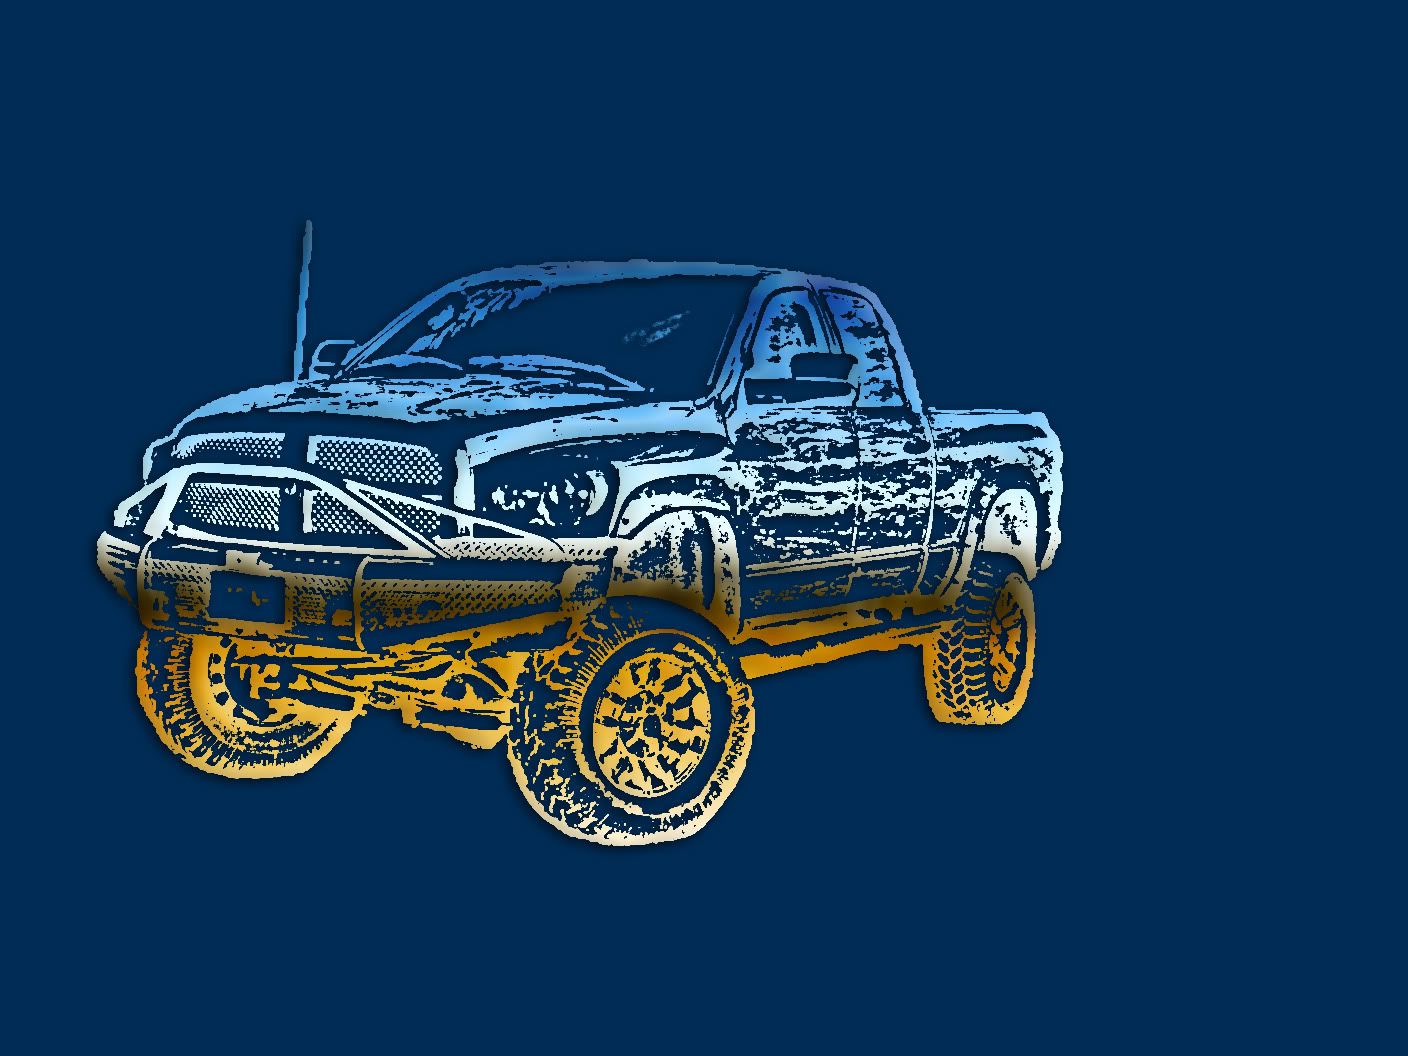
you can now alter the image by changing the color of 'Layer 2' and the color of the overlay on 'Layer 3'.
a white image on blue...possibly a tshirt design
you can also experiment around with patterns or w/e you want.
There are numerous other ways to create line drawings from images. I've just shown what I have found to be the most versatile way. I've used it on planes, space craft, trucks and portraits with great success.
 Topic: Lesson 3: Line Drawing from an Image (Read 2205 times)