So I recently made the decision to change out my gauges from DiPricol to Isspro. I'll get into the details later but I wanted to give you a bit of an reviewof the new Isspro Performax line of gauges.
The Performax line is a big change from what we are used to. Currently when you add a gauge, you have all the sensor, power, dimmer and ground wires to each gauge with most of them running through the firewall into the cab. When installing a couple of gauges, this usually works out fine but the more gauges you add to a spot the bigger the bundle gets. Isspro rethought this and does the Performax line differently.
For this system, two things happen:
1. The sensors for the gauges terminate in a little black box.
2. All the gauges are connected to a 3 wire bus like a string of Christmas lights
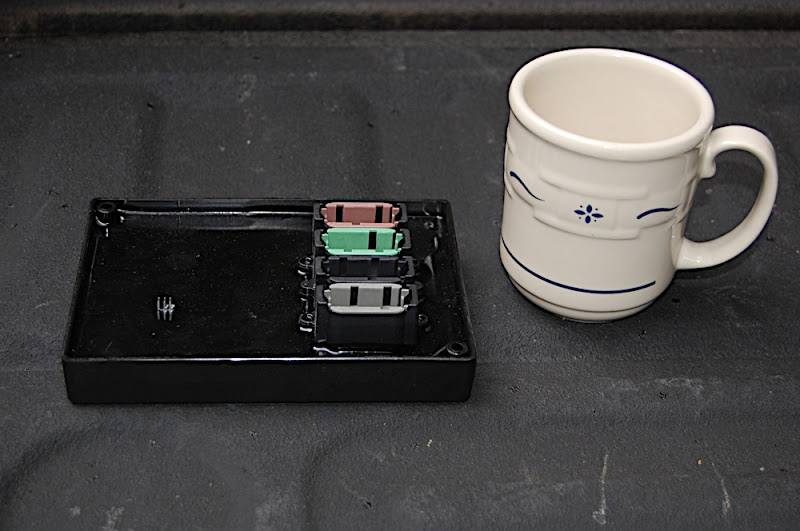
Here is the little black box with the base set of wires (power, ground, signal, dimmer, etc). This ESP (electronic signal processing brain) can monitor and report on up to 17 different gauges. Now, do you need 17, probably not but you are free to mix and match and change out gauges depending in your preferences.
This will give a little you a little better scale, its actually quite small
(Please note. I will add a note at the end where I tapped wires but it will be for an '06 Ram. Your tap points may be different)
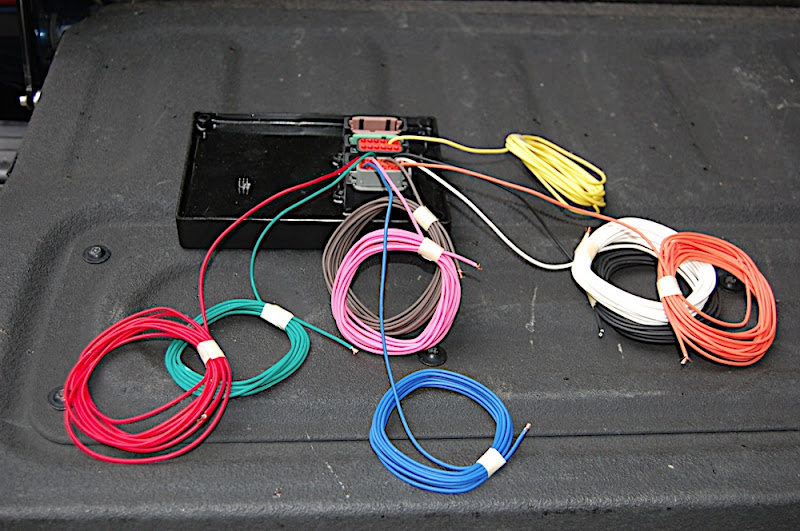
For any setup you will require one ESP as this is the basis for the system. Each gauge you buy (they have 40 different one) comes with the gauge, sensor and wiring harness. My install started with the Rail Pressure and the Trans temperature gauges. Here is the full set of parts as I received them. The only parts needed to complete the install are fittings for the ESP power, ground, dimmer and ignition wires. You will also want to added fuses to the power and ignition wires. ($15 at any auto parts store will get you all thats needed)

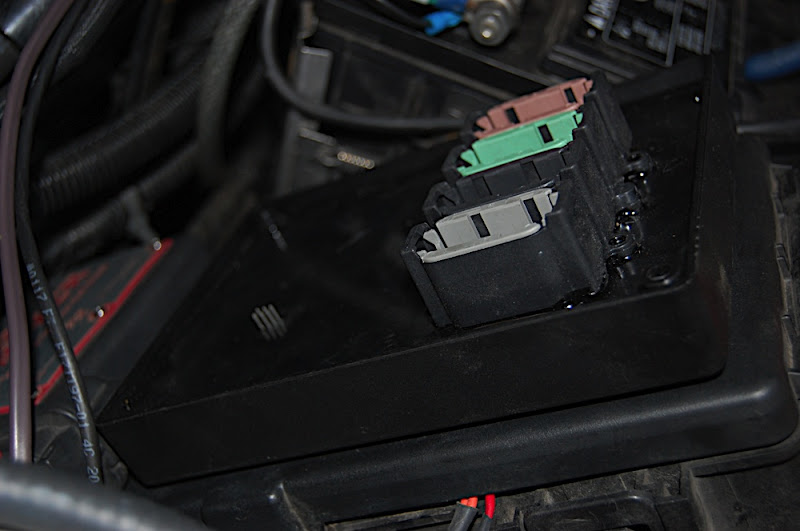
I mounted the unit on the TIPM module on the left side of the engine bay using some industrial strength velcro. The power, switched power, and ground wires will connect directly behind the unit. The remaining 5 wires will run into the cab( dimmer, recall and the three gauge wires (orange, black and white)). Once I found the spot, it probably took 2 hours to get ESP mounted and wired in done but I am rather meticulous about my wiring.
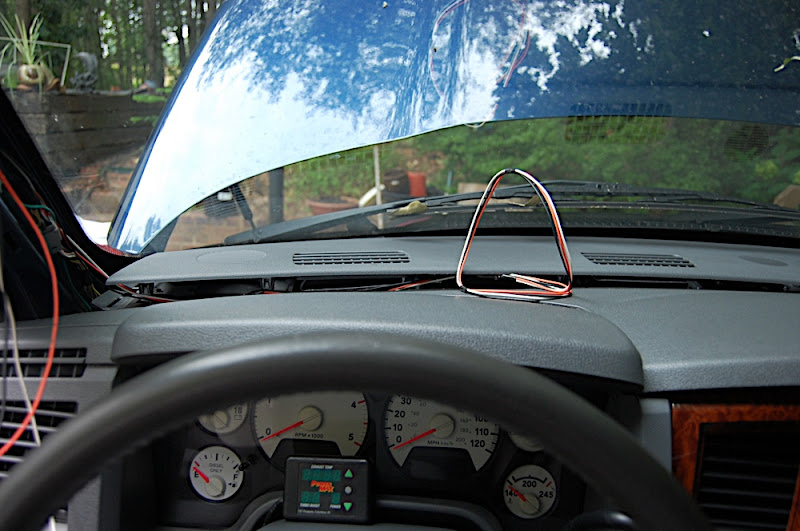
I next ran the 5 wires, dimmer (green), recall (yellow) and gauge wires (orange, white, black) through the firewall. The dimmer and recall wires terminated behind the dash with the balance going to the upper dash and the A pillar. The ESP module comes with about 15 feet of wire for the gauges and will easily run to any point around in the cab ( A-pillar, overhead console, dash, etc) I picked the dash since it will soon be the home of a triple gauge pod. The remaining wire I ran up the A-pillar.
(Here is Bufords Dash Pod mount instruction.
http://www.dodgeownerforums.com/smf/index.php?topic=8156.0 )
You can see the wire I ran under the dash
 Gauges
Im not going to cover all the details as there are plenty of install instructions in the DIY section of the board but I will show the basic Rail Pressure install here.
The stock RP sensor is located right behind the intake horn

The harness that comes with the RP gauge plugs right in between the sensor and the trucks wiring harness.
Note: If you have performance adding electronics, this harness will need to be connected first and any other devices connected afterwards.

The crimped pins at the end of the sensor harnesses plug into these connectors. Unused connections have these little red pins installed and each gauge/set of wires added to the ESP goes into a predetermined location. The Rail Pressure wires (green and black) are connected to this plug on pins 4 and 5. This step is actually really easy to do and I think it took 10 minutes to put this complete harness in place.
RP plug and inserting wires


Here is one of the supplied connectors and pins (these plug into the ESP and protect the electrical connections from the weather)
 So whats all the fuss about?
This is actually the great part of the whole system. Lets take a look at the picture below where I have plugged the Rail Pressure and Trans Temp gauges into the 3 wire gauge harness. The ESP sends all the signals to the gauges via this harness so no more fist full of cables to bend and worry about. Just add a sensor in the engine bay and then add the gauge in the cab. See, just THREE wires.

Here are both of my gauges plugged in and running. I dont have everything mounted as Im waiting on the dash pod and the EGT gauge but I wanted to show you how flexible this system really is. Take a close look at the gauges and then look again after the first half of the video, you'll see I switched them around between runs.
I mounted the RP gauge in the A-pillar. Since my TST shows rail pressure (way down in the menus) I thought I would compare the two side by side.
My ImpressionsThe ESP install is really a breeze. The unit mounted conveniently on the TIPM module in the engine compartment and only 5 wires total run into the cab to support the dimming, all 17 potential gauges and recall function. Every gauge you add will snap into the harness in the cab while each sensor plugs in the ESP module in the engine bay. They also have about 40 different gauges with each one in multiple styles and colors (black or white face, blue red or white pointers, etc)
The instructions provided for the ESP and each of the gauges are very clear and the gauge harness instructions also provide vehicle specific information (On Dodge look here, on a Duramax look here, etc)

The gauges themselves are very good quality. The front flat face is very nice and produces almost no glare compared to some others.
It really doesn't get much simpler after you install the ESP. The upfront cost of the Performax is a bit higher as the ESP alone is about $250 dollars before you even get the first gauge. However, all the gauges are a bit less expensive since the intelligence is in the ESP. I think the "break even" point is about 3-4 gauges.
Cool Stuff/What did I leave out? Ok, I left out some of the cool stuff since I haven't played with it yet

I didn't speak to the Total Recall function but it will apparently recall the high/low settings of each of the sensor/gauges. Run down the track and at the end of your run you can recall the high/low sensor reading to see how your truck is performing. No need to watch the gauges...
(This feature is dependent on having a boost sensor hooked up so when I get one I'll let you know how it works.)
How about the Performax data logger? This lets you hook up your PC to the gauge network and collect all the raw data on your laptop for analysis later.
Wiring for 06 CumminsPower and Ground - Connected to the battery
Switched Power - Connected to C3 pin3 of the TIPM
Dimmer wire - Connected to the Red/Black wire on the headlight switch
Extra parts needed for ESP install2 fuse harnesses (for power and switched power)
2 fuses - 3 and 15 amp
2 ring terminals (power , ground)
2 power taps (dimmer wire and switched power)
 Topic: Isspro Performax gauges and first impressions - Final (Read 9154 times)