270799 Posts in 19739 Topics - by 1829 Members - Latest Member: Simplesimon

Hello Guest
Show unread posts since last visit.
Show new replies to your posts.

Author Topic: Common Rail Fuel Injector Disassembly & Reassembly  (Read 16138 times)

Offline Cumminalong

  • Master of Destruction - Breaker of performance parts
  • Official DOF Vendor
  • Mechanical God!!!
  • ***
  • Posts: 25349
  • The BOMB'r
  • Awards:
    1100ROTYMember of the Year1 Tech
Common Rail Fuel Injector Disassembly & Reassembly
« on: March 28, 2009, 10:18:09 pm »
So I have a spare fuel injector in the shop, (thanks to to our buddy Dave for hooking me up with that) :up:, and since the weather is crappy and I can't do what I was wanting to on the truck, I figured I'd do a disassembly and show you what your CR Fuel Injectors look like and how to do it.

First of all, you gotta get the suckers out, which is the biggest hassle. Please see THIS THREAD for removing and replacing the fuel system and injectors.

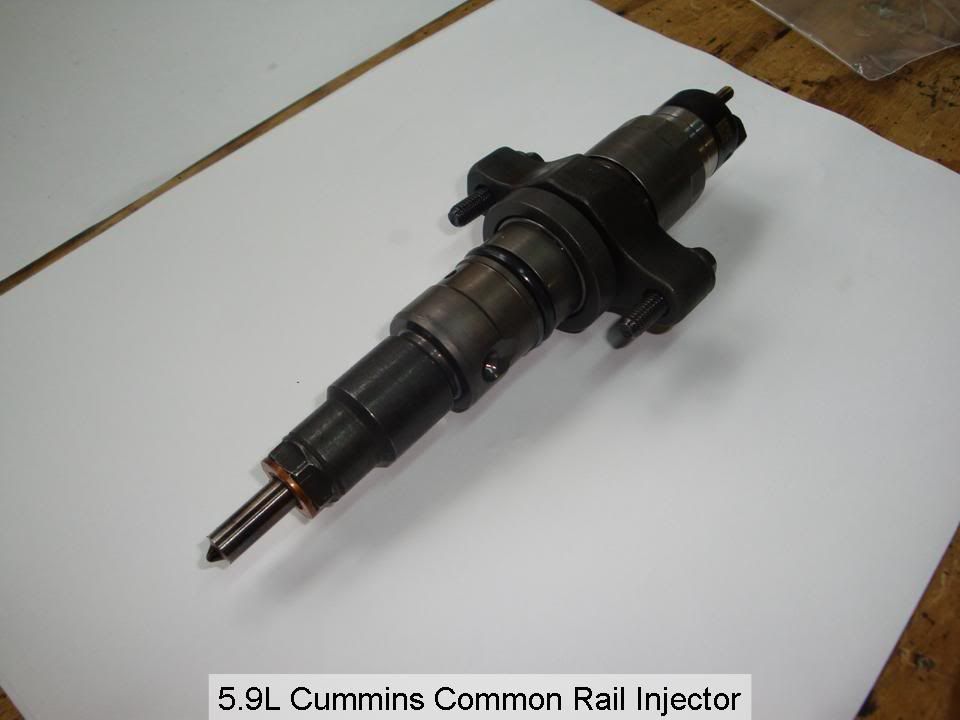
Now that we have the injectors removed, let's see what we have.

Here is the injector after I cleaned up on the exterior to remove the fuel and oil that will be covering it.


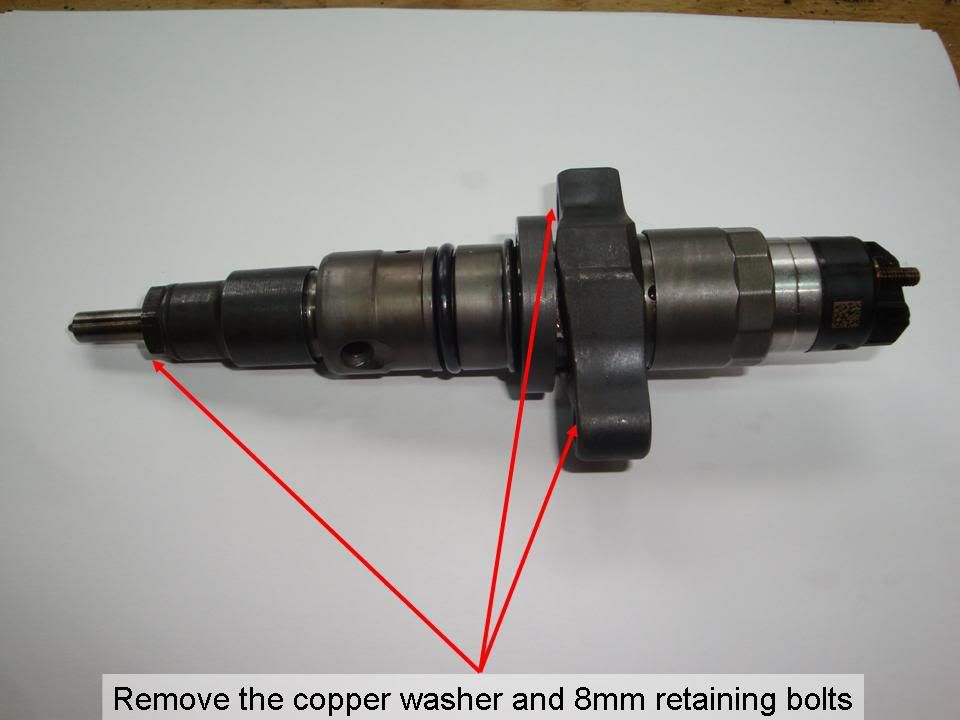
Let's remove the copper washer and the two 8mm retaining nuts that hold the injector in the head.


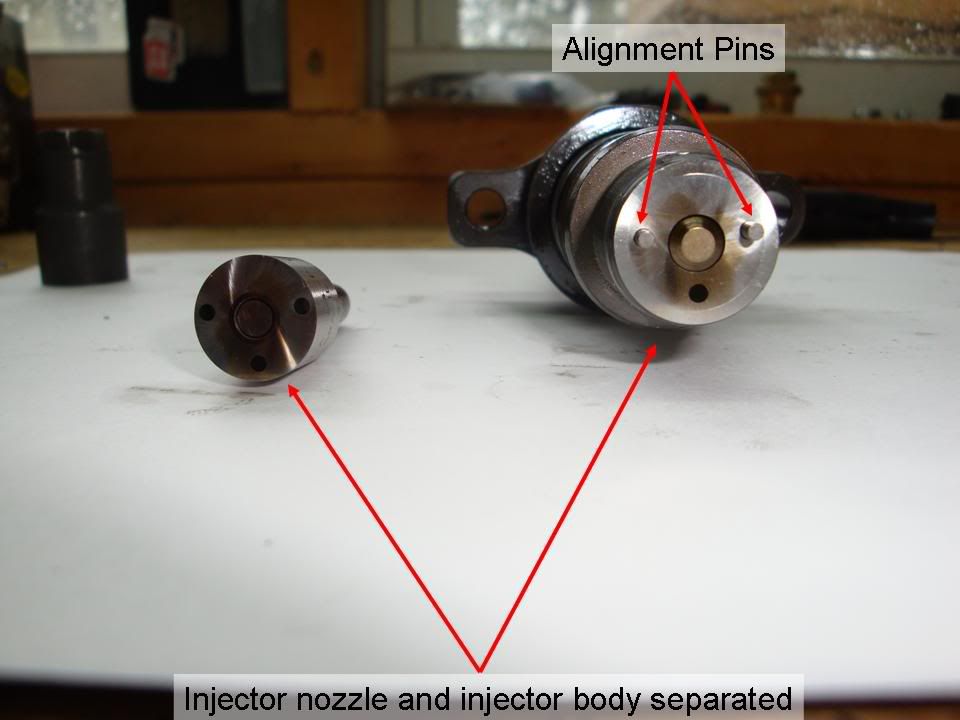
Now we need to separate the nozzle from the body by removing the nozzle retaining sleeve. Use a 15mm deep socket to do this, it's on very tight.


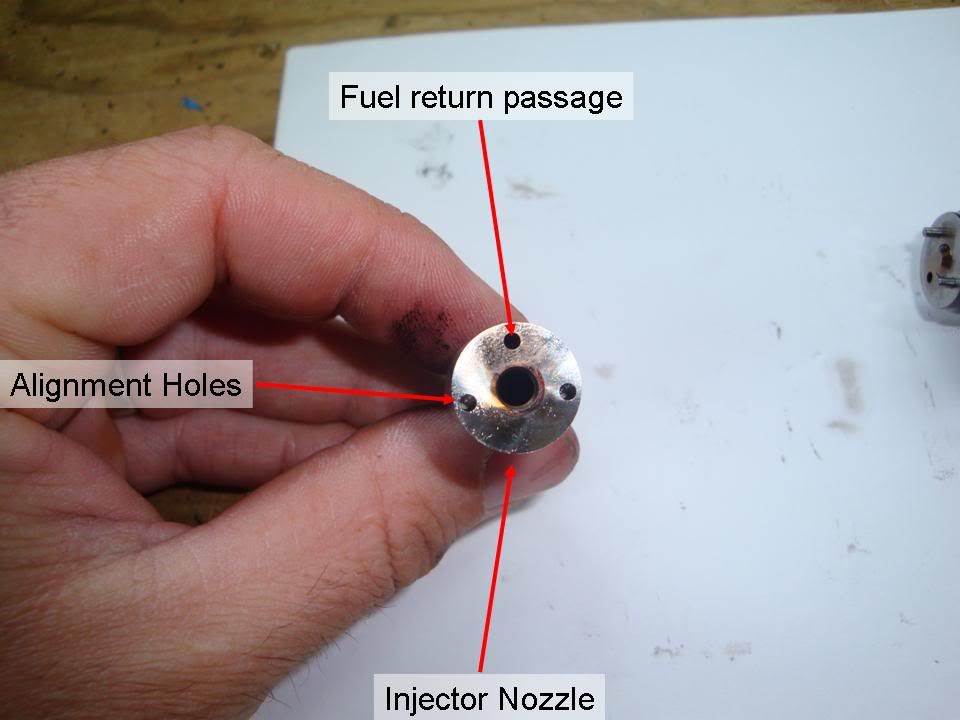
Now we can separate the nozzle and the body. Note the alignment pins and holes that prevent you from assembling it incorrectly.

One area to pay particular attention to is the space between the plunger & return passage on the body and the needle & return passage on the nozzle. If a crack is going to develop, this is probably the area it will show up. If one is cracked, you can almost guarantee the other is as well.


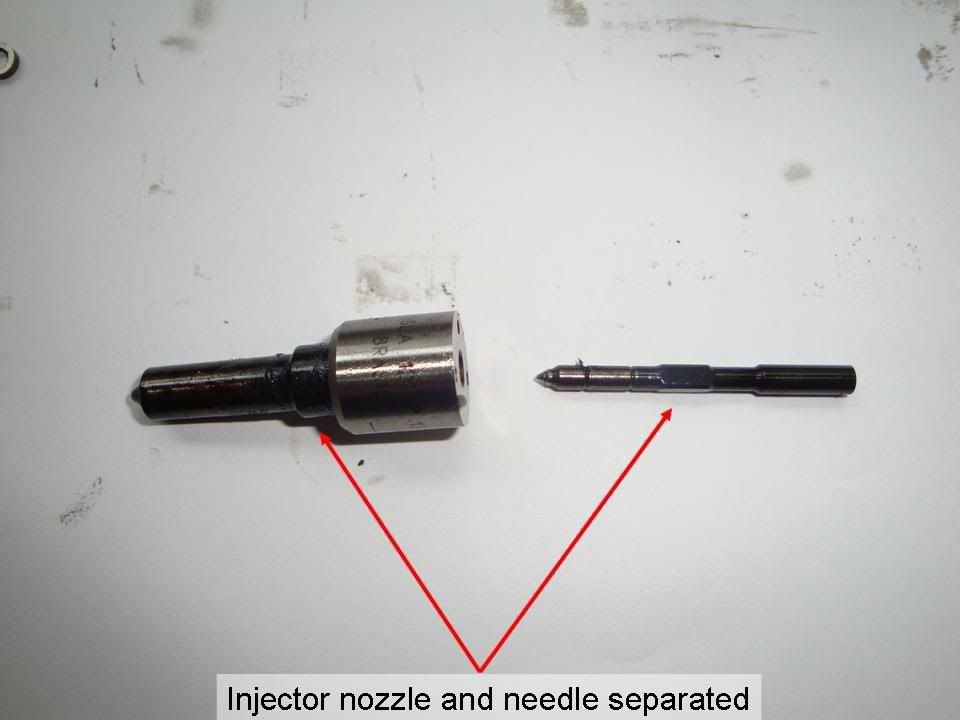
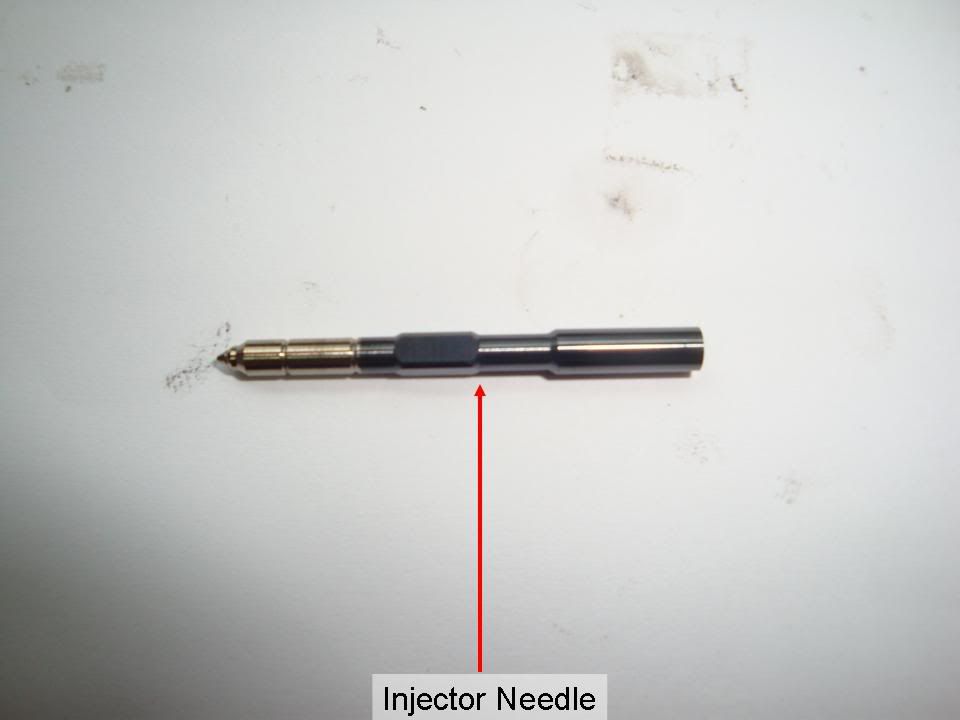
Now we can remove the needle from the nozzle. These two parts need to be cleaned as it is the major cause of stuck injectors leaking and burning up pistons and cylinder walls


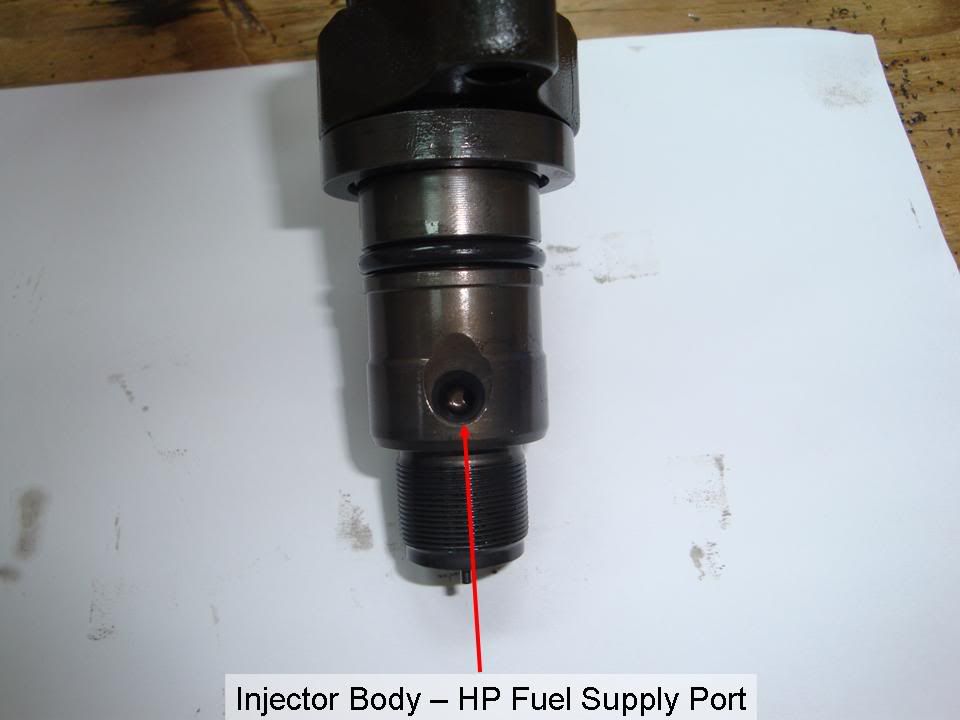
Now let's move to the injector body.

Here is the high pressure port that the connector tube seals against. This seal is formed by the correct torque on the connector tube retaining nut pushing the tube against the injector body. This nut must be tightened to 37 - 42 lb/ft to seal correctly but not bend the connector tube.


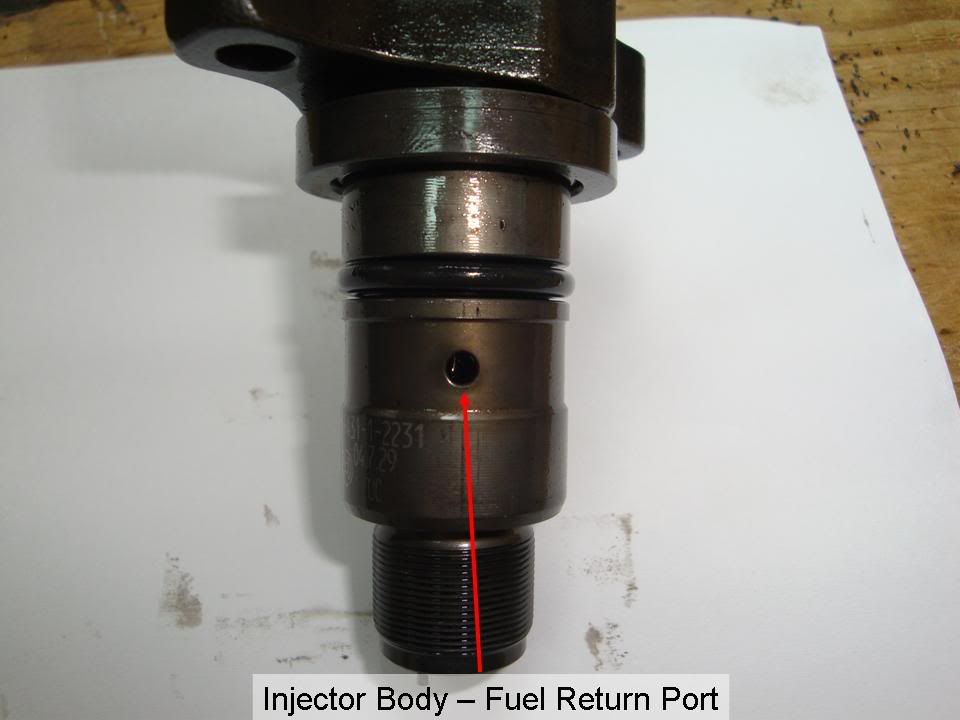
Here is the return port that bleeds excess fuel into the return channel that is machined into the head itself.


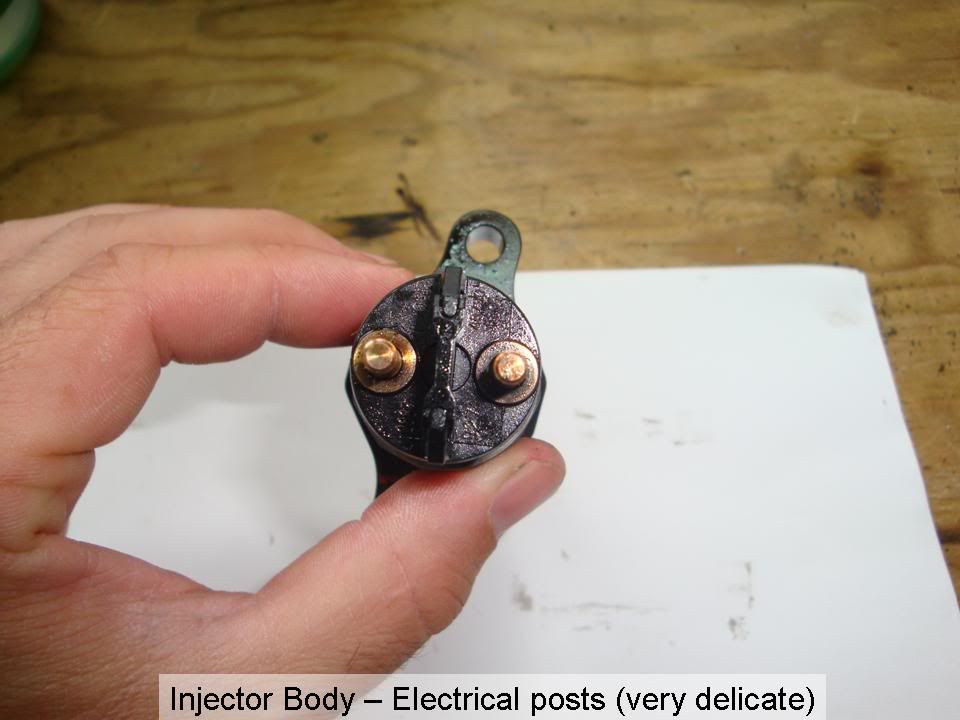
Here are the two electrical posts that are how your injector is actually controlled by the ECM. These posts are very delicate, use caution when securing the 8mm nuts to them when you reinstall the injector.


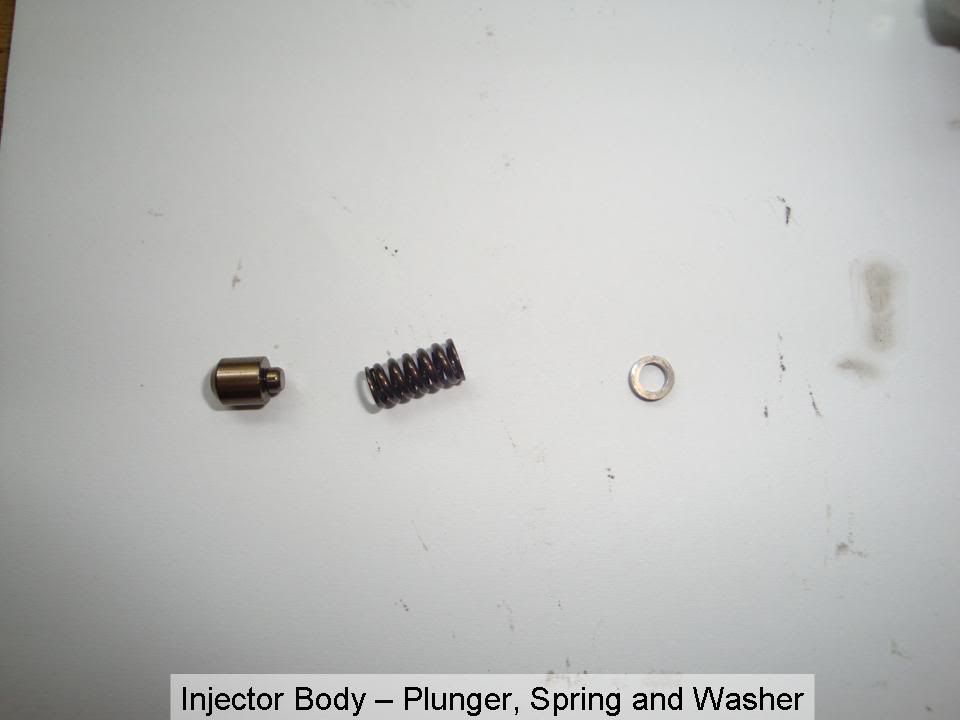
Now, let's remove the plunger, spring and washer from the injector body.

Simply tap the injector body in your hand and these 3 pieces will come out. Be careful when doing this as the locator pins for the nozzle may also come out.


Here is what all your disassembled parts should look like now. Use a little WD40 and compressed air to clean the parts and reassemble. DO NOT use any harsh abrasives to clean your parts. A soft bristle tooth brush, compressed air and some WD40 or PB Blaster is all that's needed.

CLEANLINESS CANNOT BE OVER EMPHASIZED WHEN WORKING ON THE COMMON RAIL INJECTORS. The smallest piece of dirt can destroy your nozzle and needle and lead to much bigger problems.


Now, to reassemble, simply do the process in reverse....

1 - Reinstall the washer, spring and plunger into the injector body
2 - Reinstall the needle into the injector nozzle. Use a small amount of WD40 here.
3 - Reinstall the injector nozzle retaining sleeve


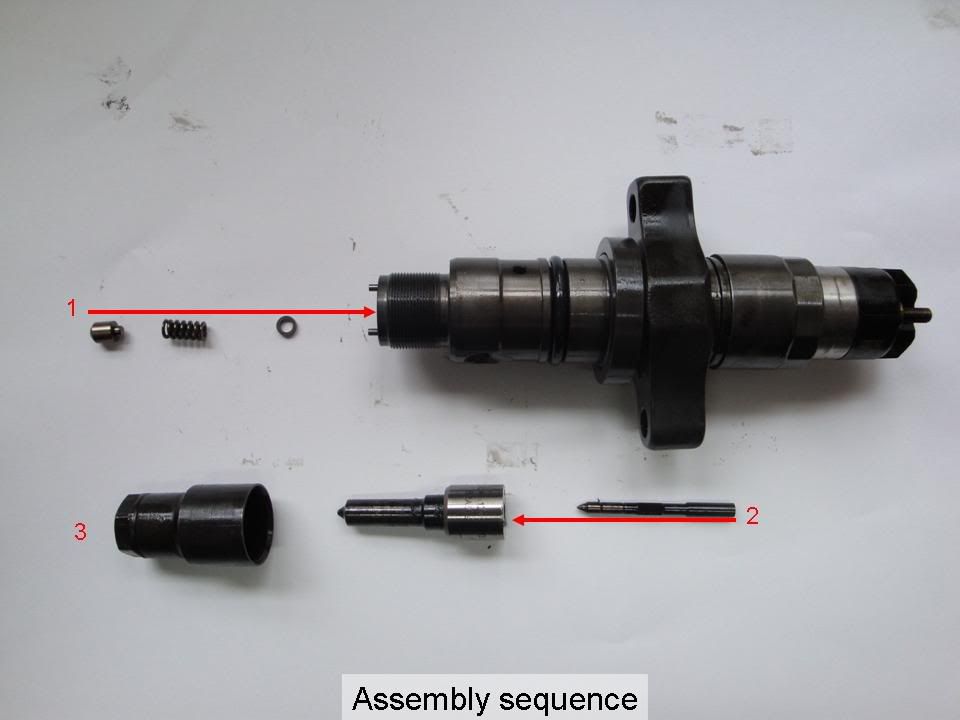
Now, just follow the rest of the sequence in the above mentioned DIY to reinstall your assembled injectors.
« Last Edit: March 28, 2009, 10:39:28 pm by Cumminalong »

Offline BigRiver

  • The Patriot Missile
  • Regular Member
  • NASCAR Crew Chief
  • *
  • Posts: 6842
  • Awards:
    100k600 HPROTMDonation
Re: Common Rail Fuel Injector Disassembly & Reassembly
« Reply #1 on: March 28, 2009, 10:27:47 pm »
Great disassembly there. I take it that wasn't your first time doing that eh?


When changing out the nozzles, that's most of the procedure I take it?


Plain Jane Stock (for now)

Offline Cumminalong

  • Master of Destruction - Breaker of performance parts
  • Official DOF Vendor
  • Mechanical God!!!
  • ***
  • Posts: 25349
  • The BOMB'r
  • Awards:
    1100ROTYMember of the Year1 Tech
Re: Common Rail Fuel Injector Disassembly & Reassembly
« Reply #2 on: March 28, 2009, 10:29:02 pm »
Changing the nozzle is the easy part.

Getting the injectors OUT is the tedious part.

Offline NickC

  • Mechanical God!!!
  • *****
  • Posts: 10686
  • V-neck pimp daddy
  • Awards:
    100kHeavyrotm400Donor
Re: Common Rail Fuel Injector Disassembly & Reassembly
« Reply #3 on: March 28, 2009, 10:56:17 pm »
although i don't think i will be taking this job on myself ANYTIME soon... its freakin awesome of you to do these write ups for people that plan to!


05 2500 AUTO 4X4 4:10 LARAMIE CTD-CAT/SILENCER RING?, AERO 4040XL, SMARTY, XM RADIO, RECON CAB LIGHTS, CUP SMOOTHIE, QUAD COMMANDER, CFM+ MANIFOLD, S&B INTAKE, FOX WEATHER BOOTS

Offline mayfair

  • Master Smartazz!!!
  • Shade Tree Certified
  • Mechanical God!!!
  • ***
  • Posts: 19914
  • Last 8 - w j 1 8 7 6 2 5
  • Awards:
    rotm200k400 HPShade TreeContributorDonor
Re: Common Rail Fuel Injector Disassembly & Reassembly
« Reply #4 on: March 29, 2009, 12:01:53 am »
AWESOME job Rich !!! :up:

You mention the smallest piece of dirt could hem you up and it got me thinking ... What kind of towels are you useinf while cleaning stuff up? I know a lot of them throw off small pieces of lint. Could that be a problem?

Thanks again Rich ... You ROCK !!! :punk:

Offline Cumminalong

  • Master of Destruction - Breaker of performance parts
  • Official DOF Vendor
  • Mechanical God!!!
  • ***
  • Posts: 25349
  • The BOMB'r
  • Awards:
    1100ROTYMember of the Year1 Tech
Re: Common Rail Fuel Injector Disassembly & Reassembly
« Reply #5 on: March 29, 2009, 01:14:12 am »
Lint's not gonna hurt anything.......7000 - 20000 psi will blow through that like it's not even there. It'll pretty much disintegrate something like paper or cotton.

What you need to watch out for is the dirt, sand, etc that will destroy the nozzle, needle and plunger.

I wash the parts in a little bit of clean diesel in a small cup, wipe them down, hit them with some compressed air, then a little WD40 prior to assembly.

The stuff I have the injector sitting on is just plain paper.

Offline FroneDaddy

  • Shade Tree Certified
  • NASCAR Crew Chief
  • ***
  • Posts: 5267
  • Awards:
    MileHighShade TreeDonorContributorFF
Re: Common Rail Fuel Injector Disassembly & Reassembly
« Reply #6 on: March 29, 2009, 06:25:53 pm »
EXCELLENT job brotha, THANKS!

:up:
I'm An and I Drive A

Offline ChinookFE

  • Master Technician
  • ***
  • Posts: 1292
  • Engine Area Clear, Fire Guard Posted, Ready on One
  • Awards:
    MileHileArmy
Re: Common Rail Fuel Injector Disassembly & Reassembly
« Reply #7 on: March 30, 2009, 05:23:57 am »
Pretty sweet DIY...I actually learned something


'96 Ram 1500 4x4, 3", 35"s, Bunch 'o goodies


Questions, Concerns, Comments? Contact DOF Administrators
DodgeOwnerForums.com is not affiliated with Chrysler Group, LLC or Cummins, Inc